Installing a poller in a container
The container-based poller deployment method is currently in BETA. You can test it and give your feedback in our dedicated group on our community platform The Watch.
A ready-to-use installation command for container-based pollers can be retrieved from the central server's interface, tailored to your platform.
Container contents
Container-based pollers use Debian 13.
Instead of a single monolithic container, each poller component runs in its own dedicated container
(Centreon Engine, Gorgone, and optionally VMware
monitoring), orchestrated by a single docker-compose.yaml file.
This deployment method relies on a generated installation command that downloads
and runs an installer script on the target container host. The script generates the
.env and docker-compose.yaml files for you and starts the stack.
See Users and groups for the system users (
centreon-engine,centreon-gorgone, etc.) used inside these containers.
Prerequisites
- A Linux host with Docker Engine and the Docker Compose v2 plugin
installed (
docker compose versionmust succeed). - You must have a poller-type authentication token (Cloud platforms have a default one, called poller-default).
- Outbound network access from this host to your Centreon central server: web port (443 for HTTPS, 80 for HTTP) and TCP port 5669 (Centreon Broker).
- If you plan to monitor VMware infrastructure from this poller, the
centreon-vmwareDocker image must be built beforehand (see Centreon-vmware container).
Step 1: Generate the install command
-
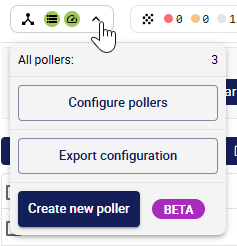
On the central server, click the pollers zone at the top left of the screen and in the popup that opens, click Create new poller.
-
Fill in the poller's information:
- Poller name: a unique name for this poller. It will appear in the list of pollers. The name must contain no spaces or special characters, and the first character must be alphanumeric.
- Poller address: the address of the host machine where you are going to install the poller.
The Poller address does not affect connectivity: Gorgone uses PullWSS, so the poller always initiates the connection to the central server, not the other way around.
-
Select Container as the poller's environment.
-
Select your authentication token.
-
In the Generate installation command section, click the button and wait for the command to be generated.
-
Copy the command using the button at the top right of the code block. Keep the window open: you will need to use it again later.
-
Add to the command any optional flags you want (e.g. to allow the poller to receive data from CMA agents, or if you want to monitor VMware resources. In both cases, you will need to follow the corresponding procedures in Advanced container configuration).
-
If you want to be able to use custom plugins, follow the corresponding procedure in Advanced container configuration.
Step 2: Run the install command on the container host
-
Run the copied command as a user who is allowed to use containers on the target host.
What the script does
The script:
- Checks that Docker and the Docker Compose v2 plugin are available.
- Generates a
.envfile and adocker-compose.yamlfile in the current directory. - Starts the stack with
docker compose up -d, unless--no-startwas added to the command (in that case, start it yourself later withdocker compose up -d).
By default, the generated stack always includes two services:
- centengine: Centreon Engine, the monitoring engine.
- gorgone: Gorgone, in charge of retrieving the poller's configuration and communicating with the central server.
Generated files reference
The
docker-compose.yamlgenerated by the install script wires the services together using named Docker volumes, so you don't need to configure this yourself:Volume Shared between Purpose poller-enginecentengine, gorgone Centreon Engine configuration ( /etc/centreon-engine)poller-brokercentengine, gorgone Centreon Broker configuration ( /etc/centreon-broker)poller-centcmdcentengine, gorgone, centreontrapd Centreon Engine's external command pipe ( /var/lib/centreon-engine/rw)poller-snmp-spoolsnmptrapd, centreontrapd Spool directory where received traps are written and then processed Each service also has a Docker healthcheck, so
docker compose psreportshealthyonce a service is fully up. -
Check the health status of the
gorgonecontainer on the container's host:docker compose psOnce
gorgonereportshealthy, the connection to the central server is established.
Step 3: Export the configuration
On the central server, go back to the poller creation window and click Export configuration.
The poller then shows up as running on the Configuration > Pollers page:

Optional services to add to the installation command
The basic generated command looks like this:
curl -fsSL <CENTRAL_URL>/poller/install.sh | bash -s -- \
   --type docker \
   --poller_token <TOKEN_NAME>:<TOKEN_SECRET> \
   --uid <POLLER_UID> \
   --name '<POLLER_NAME>' \
   --central_url <CENTRAL_URL> \
   --appsecret <APP_SECRET> \
   --salt <SALT>
Add the following flags to the install command to include additional features:
| Flag | Effect |
|---|---|
--with-vmware | Allow the poller to monitor VMware resources (adds the centreon-vmware service to the docker-compose). |
--with-cma | Allows the poller to receive data from Centreon Monitoring Agents (CMA). Mounts TLS certificates and exposes port 4317, for pollers that accept connections from the Centreon Monitoring Agent (CMA) over OpenTelemetry gRPC. |
--tz <timezone> | Sets the container timezone (default: UTC). |
--debug true | Enables debug logging on the services. |
--gorgone-ssl <true|false> | Overrides the SSL setting used for the Gorgone connection to the central server (by default, HTTPS if the central server already uses HTTPS). |
--no-start | Only generates .env and docker-compose.yaml; does not start the stack. |
If you already ran the install command without these flags, you can also add
the corresponding service(s) by hand to the generated docker-compose.yaml
and .env files, then run docker compose up -d again.
Running the installation command again regenerates
.envanddocker-compose.yamlwithout warning: any manual change (custom plugins, CMA, etc.) is lost. Back up these files before running the command again.