Configuring Open Tickets
Configuration
Select a provider
The module offers many ready-to-use providers listed in the dedicated integration section.
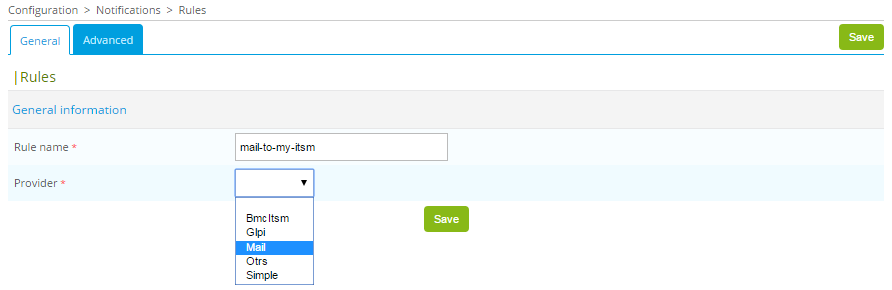
Each provider has its own configuration, but a provider can be added in Centreon in the following way:
Go to the Configuration > Notifications > Open Tickets > Rules menu. Click on Add button:

Define Rule name and select Provider:
A new form appears: configure the provider.
Hosts & services
In order for resources (hosts and services) to receive a ticket number, it is necessary to add a personalized macro to them.
The best way is to create these macros in a host template and a service template inherited by all objects using models from which all resources will inherit.
Go to the Configuration > Hosts > Templates menu and look for the generic-active-host-custom template, and edit it. Add the macro TICKET_ID and click on Save:

Go to the Configuration > Services > Templates menu and look for the generic-active-service-custom template and edit this one. Add the macro TICKET_ID and click Save:
Widget configuration
You can configure Open Ticket to be integrated into a widget:
- using the Dashboards feature with the Resource table widget,
- or using the Custom Views (legacy) feature.
- Dashboards
- Custom Views (legacy)
In the Dashboards feature, Open Ticket is available in the Resource table widget, in the list of events.
To use Open Ticket, you must add it into a dashboard.
-
Go to the Home > Dashboards menu, select your dashboard and add a Resource table widget.
-
Fill in the properties.
-
Set the parameters for your tickets in the Ticket management section.
- In Rule (ticket provider), you can define if you want to display Resources with no tickets or Resources linked to a ticket.
- In Display ticket creation buttons, you can Enable ticket creation for hosts and Enable ticket creation for services.
-
Save your changes.
Your dashboard now displays the Resource table widget containing resources with or without tickets.
You can also close tickets directly from the widget.
To use the widget, you must add it into a custom view.
-
Go to the Home > Custom Views menu, select your view and click the Add widget button.
-
Define a title for your widget (for example: Open-Tickets) and select the Open Tickets widget. Apply the same procedure to add this widget again.
-
On the first widget, to open a ticket, click the Configuration button:
- Select the Rule previously defined.
- Don’t check the Opened Tickets box.
- Select other filters.
- Don’t check the boxes Display Ticket ID and Display Ticket Time.
-
On the second widget, to display opened tickets, click the Configuration button:
- Select the Rule previously defined.
- Check the Opened Tickets box.
- Select other filters.
- Check the boxes Display Ticket ID and Display Ticket Time.
User guide
Open a ticket
- To open a ticket, select an object using its checkbox, and in the -- More actions -- menu, select the required action.
- A popup appears to define a comment. Click the Open button to open a ticket.
- Once the ticket is created, the popup displays the ticket ID.
- The selected objects disappear from the widget to open tickets.
Close a ticket
- To close a ticket, select the object using its checkbox and in the -- More actions -- menu, select the required action.
- The ticket is closed (only for Centreon).
- The selected objects disappear from the opened tickets widget.
Advanced configuration
This module offers ready-to-use providers. However, depending on the configuration of your ITSM, it may be necessary to modify these to adapt them to your environment.
List definition
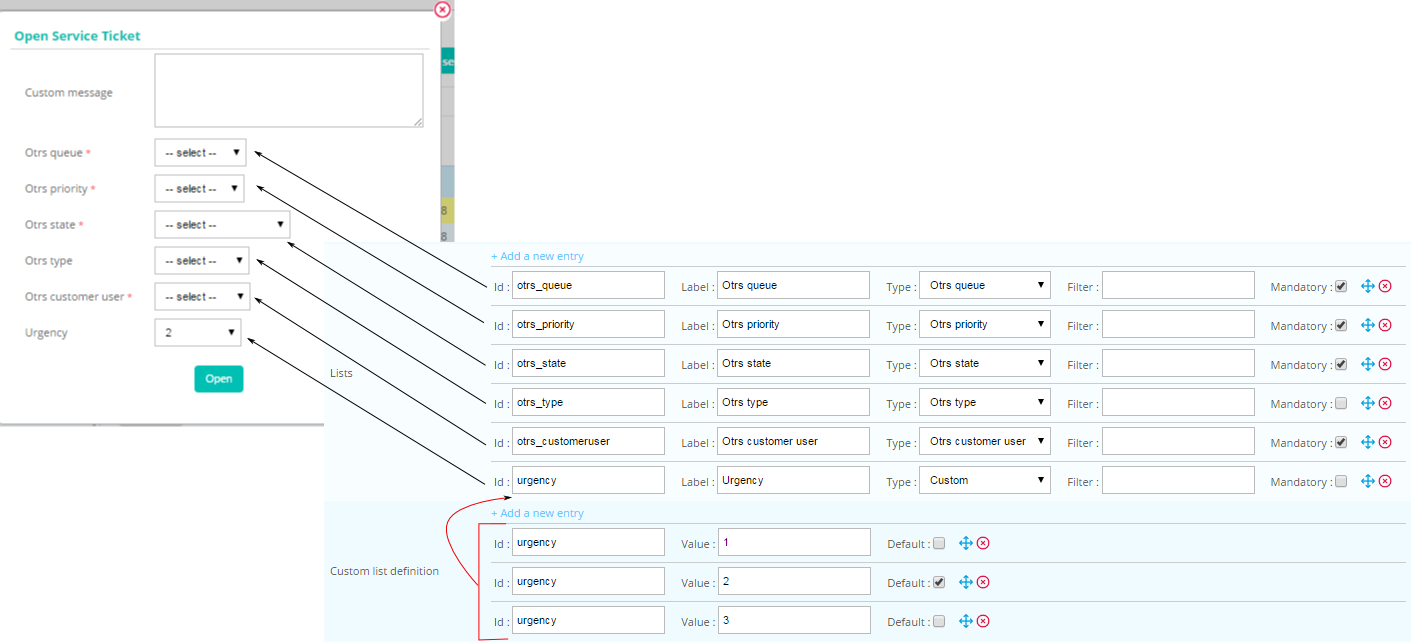
Before opening a ticket, users can choose some options in a popup. An option is to create a selection list. In the configuration provider, you can configure it in Lists and Custom list definition. For each entry in Lists, you can define:
- Id: alphanumeric value (must be unique)
- Label: displayed in the popup
- Type: which kind of list. There are three kinds of list
- Provider lists (data directly from the ticketing software)
- Centreon lists (like Host group)
- Custom lists (data from Custom list definition configuration. Id fields must be identical)
- Mandatory: checked if the user needs to set the option
The module stores the user list selection in an array (can be used in a smart section like body or mapping ticket arguments). There are 3 fields (LIST_ID must be replaced):
- {$select.LIST_ID.id}
- {$select.LIST_ID.value}
- {$select.LIST_ID.label}
Chaining rules
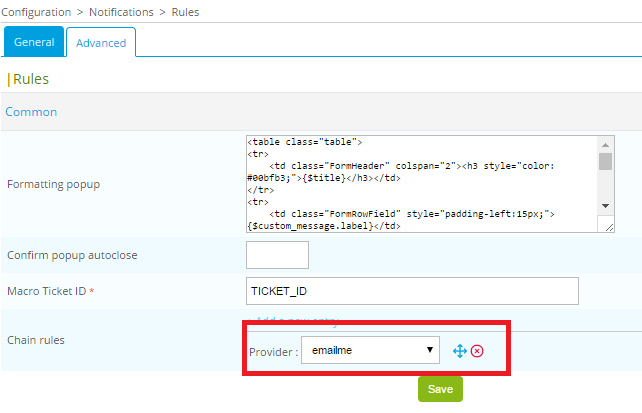
After opening a ticket, you may need to send an email. The chaining rules system is designed to do it:
- Create a new rule with the name emailme and the provider Mail
- Configure emailme in the rule of your opening system
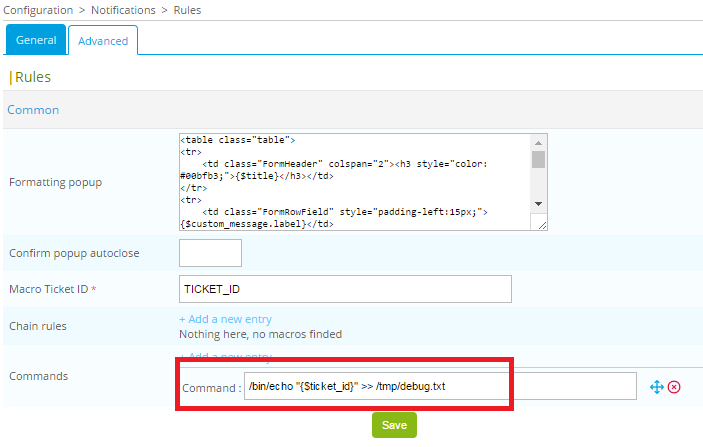
Commands
After opening a ticket, you can also configure some commands to be executed.