Configuring a Web SSO connection
Web SSO authentication relies on the Apache web server. According to its configuration, Apache is responsible for authenticating the user before allowing access to the Centreon web interface. Many Apache modules allow authentication via OIDC, SAMLv2, TLS, Kerberos, and other protocols.
Users must be present in the Centreon configuration to access the interface.
Configure Web SSO authentication
Go to Administration > Authentication > Web SSO Configuration:
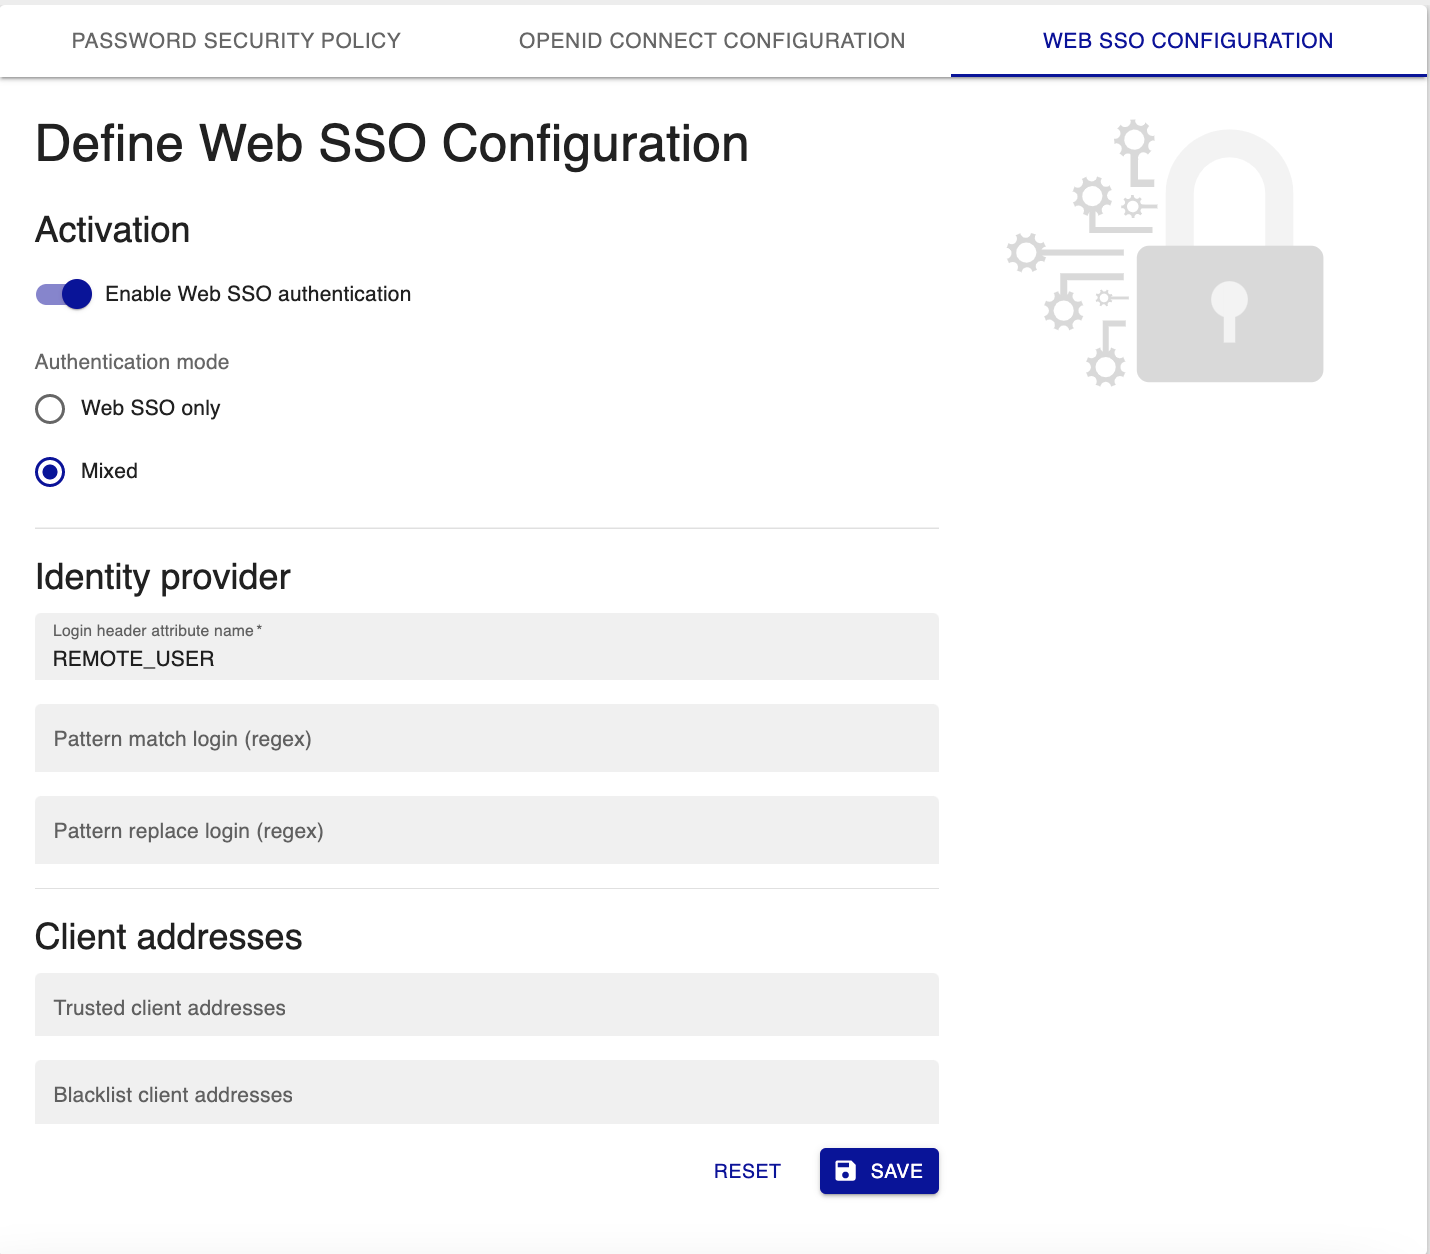
Step 1: Enable authentication
Enable authentication:
- Enable Web SSO authentication: enables/disables Web SSO authentication.
- Authentication mode: indicates whether authentication should take place using only Web SSO or using local authentication as well (Mixed).
When setting the parameters, we recommend that you activate the "mixed" mode. This will allow you to retain access to the local
adminaccount in the event of a misconfiguration.
Step 2: Configure your identity provider's access credentials
Configure identity provider information:
- Login header attribute name: which variable from the headers should be used to retrieve the user's login.
For example
REMOTE_USER. - Pattern match login (regex): a pattern to search for in the login header attribute name.
For instance, type
/@.*/to find the end of the email address in your login. - Pattern replace login (regex): the string that will replace the string defined in the Pattern match login (regex) field. Leave Pattern replace login (regex) blank to delete the string found by Pattern match login (regex).
Step 3: Configure client addresses
If you leave both fields blank, all IP addresses will be allowed to access the Centreon interface.
- Trusted client addresses: If you enter IP addresses in this field, only these IP addresses will be allowed to access the Centreon interface. All other IP addresses will be blocked. IP addresses must be separated by commas.
- Blacklist client addresses: These IP addresses will be blocked. All other IP addresses will be allowed to access the Centreon interface.
Step 4: Configure the Apache web server
You must configure the Apache module that allows authentication with the identity provider. Once this configuration is done, you must modify the Centreon configuration for Apache in order to allow access only to authenticated users.
- Edit /etc/httpd/conf.d/10-centreon.conf and search for the following block:
    Header set X-Frame-Options: "sameorigin"
    Header always edit Set-Cookie ^(.*)$ $1;HttpOnly;SameSite=Strict
    ServerSignature Off
    TraceEnable Off

    Alias ${base_uri}/api ${install_dir}
    Alias ${base_uri} ${install_dir}/www/
- Replace it with:
    Header set X-Frame-Options: "sameorigin"
    Header always edit Set-Cookie ^(.*)$ $1;HttpOnly;SameSite=Strict
    ServerSignature Off
    TraceEnable Off

    RequestHeader set X-Forwarded-Proto "http" early

    Alias ${base_uri}/api ${install_dir}
    Alias ${base_uri} ${install_dir}/www/

    <Location ${base_uri}>
        AuthType openid-connect
        Require valid-user
    </Location>
In this example, the Apache module used was mod_auth_openidc. This is why authentication is openid-connect.
- Validate the Apache configuration using:
/opt/rh/httpd24/root/usr/sbin/httpd -t
- Then restart Apache web server:
systemctl restart httpd24-httpd
- To conclude, rebuild the cache:
sudo -u apache /usr/share/centreon/bin/console cache:clear
Step 5: Configure your Identity Provider (IdP)
Configure your IdP to add the Centreon application to use your protocol to authenticate your users,
and to authorize the following redirect URI to forward your connected users to Centreon:
{protocol}://{server}:{port}/centreon/websso
Replace
{protocol},{server}and{port}with the URI to access to your Centreon server. For example:https://centreon.domain.net/centreon/centreon/websso