Monitoring with SNMP Traps
Monitoring configuration
Go to the Configuration > Services > Services by host menu and click Add.
- Set a description of the service
- Select the host to which to attach this service
- Select the generic-passive-service-custom template
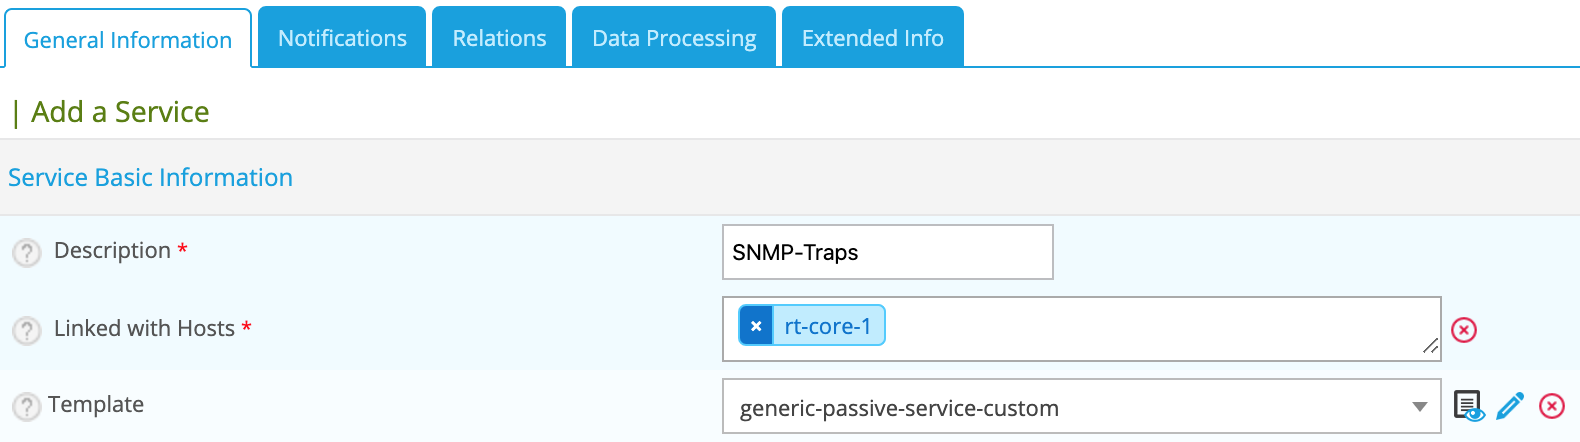
- Go to the Relation tab and select the SNMP traps
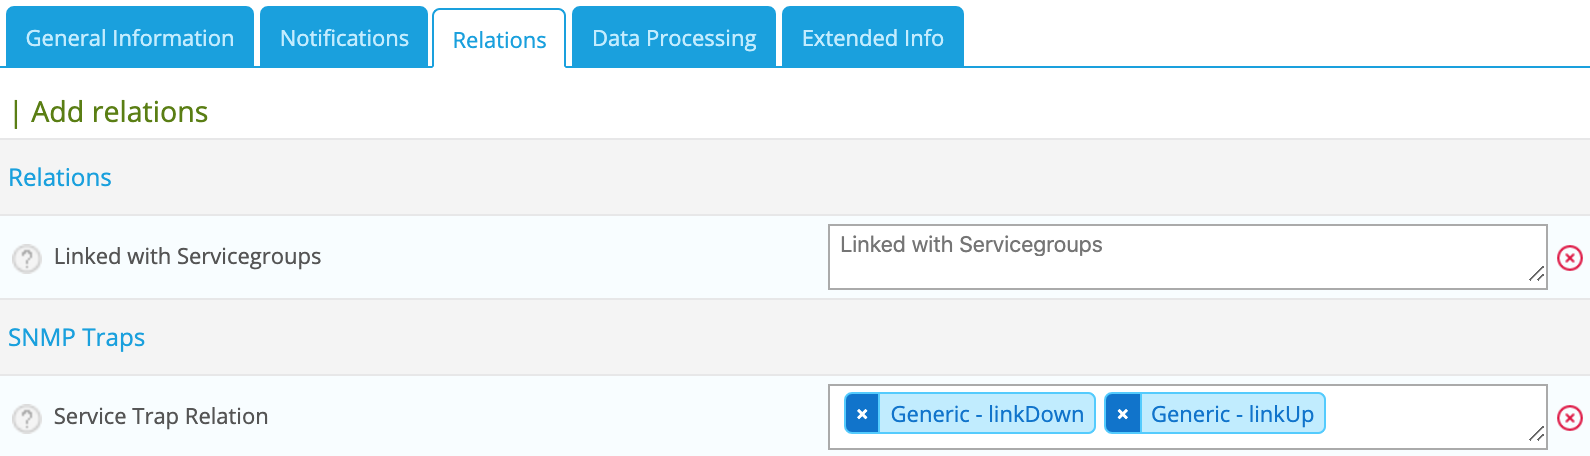
- Click Save.
Applying the changes
To be able to export the OID present in the database in the configuration file to centreontrapd, apply the following procedure:
- Go to the Configuration > SNMP traps > Generate menu
- Select the poller to which you want to export the configuration files
- Check Generate traps database and Apply configurations
- In the dropdown list, choose Send signal (the Reload option is preferable)
- Click on the Generate button
- Export the monitoring configuration
To go further
Modify the output
Use all the arguments
For an SNMP trap, when configuring the output message, the argument $* will display all the information (the value of arguments) contained within the SNMP trap. However, it is possible to display only certain information contained in the SNMP trap by calling unitary arguments.
For example:
The output message Link down on interface $2. State: $4. will display only the name of the interface and its status ($2 and $4 argument).
Where can I find the arguments?
The arguments are in the documentation of the MIB manufacturer or in the Comments field of the SNMP trap.

To show:
- The index link, use the $1 argument
- The interface name , use the $2 argument
- The administrative state of the interface, use the $3 argument
- The state interface, use the $4 argument
For example, the following output message displays all the arguments:
Link down on interface: $2 (index: $1). Operational state: $4, Administration state: $3
Active checks after trap reception
The Reschedule associated services option allows you to actively check the service after trap reception.
The active service linked in the service configuration is executed.
Execute special command
With Centreontrapd, it is possible to execute a special command after the reception of a SNMP trap. Just use the option Execute special command followed by the description of this command.
Use all the arguments (via OID)
It is also possible to specify an argument value directly without knowing the order of the arguments ($1, $2, $3, etc.). To do this, use the complete OID number of the arguments you need.
For example:
Link down on interface: @{.1.3.6.1.2.1.2.2.1.2} (index: @{.1.3.6.1.2.1.2.2.1.1}). Operational state: @{.1.3.6.1.2.1.2.2.1.8}, Administration state: @{.1.3.6.1.2.1.2.2.1.7}
Use an external variable
It is also possible to modify the output message by retrieving information via scripts or external commands and get the result to insert it in the output. To do this, within the definition of your SNMP trap, go to the Advanced tab and add one (or more) preexec commands.
For example:

The first command is snmpget -v 2c -Ovq -c public @HOSTADDRESS@ ifAlias.$1 and allows you to retrieve the alias interface. The "$1" variable is for the argument 1 associated value of linkUp/linkDown traps.
The second command is snmpget -v 2c -Ovq -c public @HOSTADDRESS@ ifSpeed.$1 and allows you to retrieve interface speed. The "$1" variable is for the argument 1 associated value of linkUp/linkDown traps.
In order to exploit the result of the first command in the output, use the argument $p1. To exploit the result of the second command in the output, use the argument $p2 .
We can then deduce the following output message:
Link down on interface: $2 (index: $1). Operational state: $4, Administration state: $3, Alias : $p1, Speed : $p2
Use a Regular expression
It is also possible to modify the output by using a regular expression with the Output Transform option. Simply define the regexp and it will be executed at trap reception.
For example:
s/\|/-/g
Will replace | in the output to -.
Route/Transfer SNMP traps
It is possible to have an SNMP trap concentrator. Example: Oracle GRID. Oracle GRID is responsible for federating information for all Oracle servers. If necessary, the Oracle GRID server sends the SNMP trap to the monitoring server.
However, from an SNMP trap sent from Oracle GRID, we want to extract the IP address of the host and display the message in the service trap not belonging to Oracle Grid but to the correct host.
To do this, perform the following steps:
- Create a generic trap, with the following parameters:
- On the Main tab:
| Attributes | Description |
|---|---|
| Trap Name | Trap name |
| Mode | Unique |
| OID | OID of the trap |
| Default Status | Trap default status |
| Output Message | Custom output message |
- In the Advanced Tab:
| Attributes | Description |
|---|---|
| Enable routing | Checked |
| Route definition | $2 (In this example $2 argument is for IP address of the host) |
- Create a second trap definition:
- In the Main Tab:
| Attributes | Description |
|---|---|
| Trap Name | Trap name (not the same as previous) |
| OID | OID of the trap (same as previous) |
| Default Status | Trap default status |
| Output Message | Custom output message |
- Associate the first definition to a service (e.g. PING) of the Oracle GRID server
- Associate the second definition to a passive service of the host.
- Generate SNMP trap definitions and restart centreontrapd
In the Route definition field you can use the following arguments:
| Variable name | Description |
|---|---|
| @GETHOSTBYADDR($2)@ | Reverse DNS resolution to know the DNS name from IP address (127.0.0.1 -> localhost) |
| @GETHOSTBYNAME($2)@ | DNS resolution to know the Ip address from the DNS (localhost -> 127.0.0.1) |
Ignore SNMP Trap when resource is on downtime
Check Downtime allow centreontrapd to check if the service is not in Downtime status at trap reception. The submission can be canceled.
This is only possible with Centreon Broker and on central monitoring.
There are three ways to configure this:
- None: nothing to do; the trap is sent as normal;
- Real-Time: with this option, a trap sent with a current downtime, the service state is not updated;
- History: option used to not acknowledge an snmp trap concerning a past event during a downtime.