Discovering hosts automatically
See also our tutorial on how to detect AWS EC2 instances.
Create a discovery job
-
Install the Auto Discovery module.
-
Install the Plugin Pack for the resources you want to discover.
The discovery providers are included in Plugin Packs (Azure, Amazon AWS, VMware, etc.). To know the complete list, please go to the Plugin Packs catalog.
-
Create a discovery job for each type of resource you want to discover: go to Configuration > Hosts > Discovery and click on +ADD. A wizard opens.
Job discovery wizard
Step 1: Choose a provider
-
Enter a name for the job (if you don't, the provider's name will be used).
-
Click on the correct provider for the resources you want to discover.
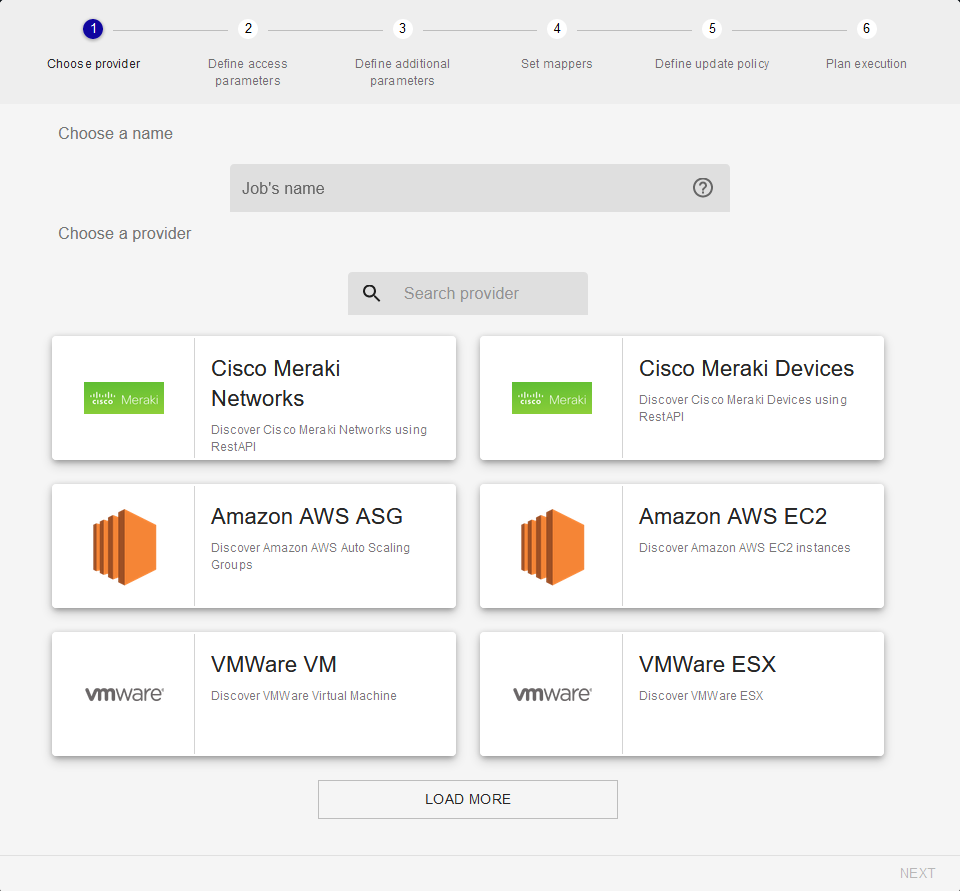
The search bar allows you to search for a specific provider:
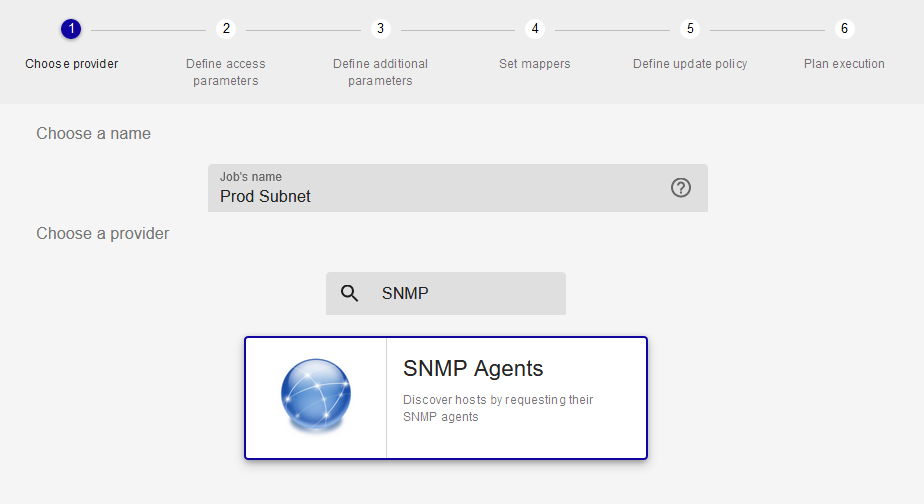
-
Click on Next.
Step 2: Define access and discovery parameters
Define the monitoring server from which the discovery will be made.

Some providers ask for other parameters such as a proxy if the discovery is made on an online service, and/or credentials.
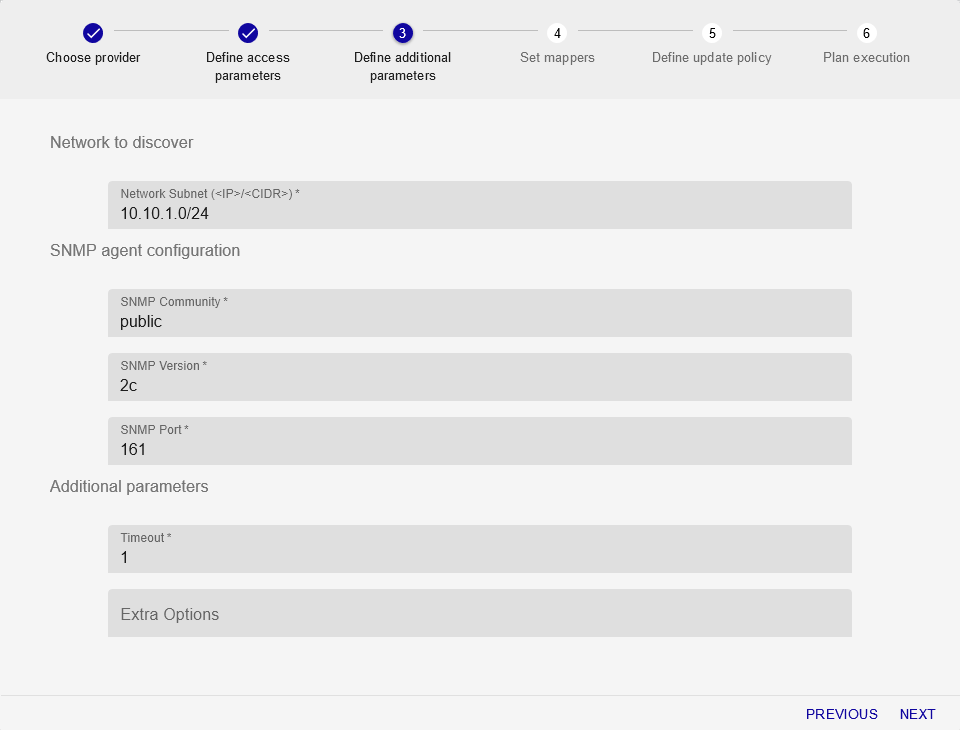
Step 3: Define additional parameters
Some additional parameters might be needed to define the scope of the discovery:
Step 4: Set mappers
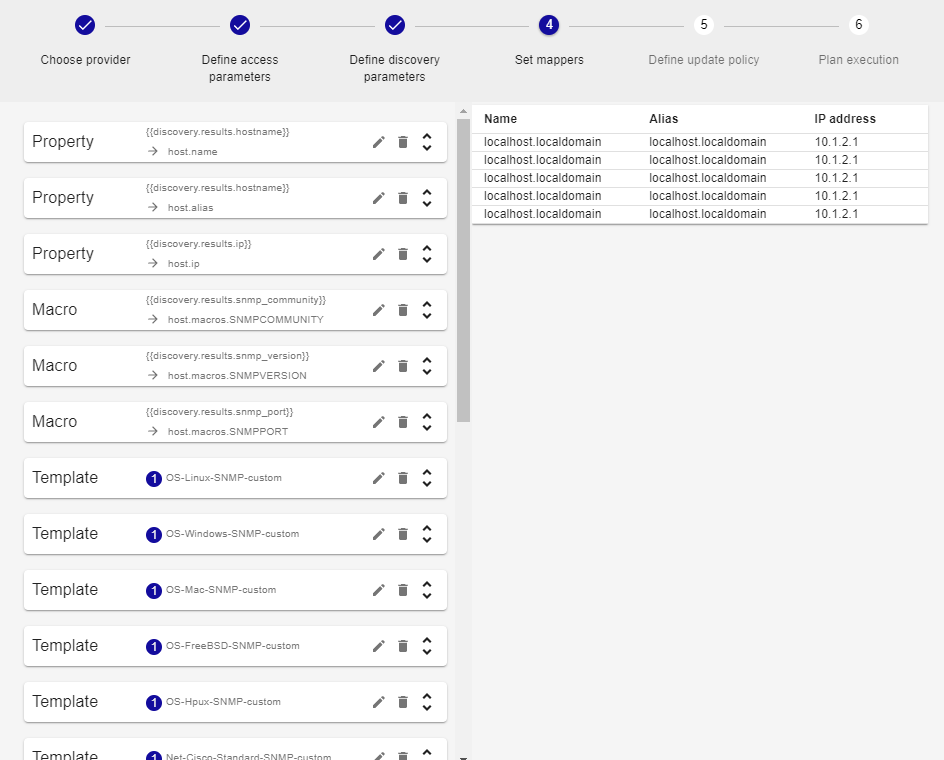
Mappers define how the discovery results will be processed to create hosts in the configuration. They can also be used to include/exclude hosts from the list of results. See section How to use mappers.
In the wizard, a real-time simulation on a set of example data (the table on the right) gives a preview of what the discovery results could look like:
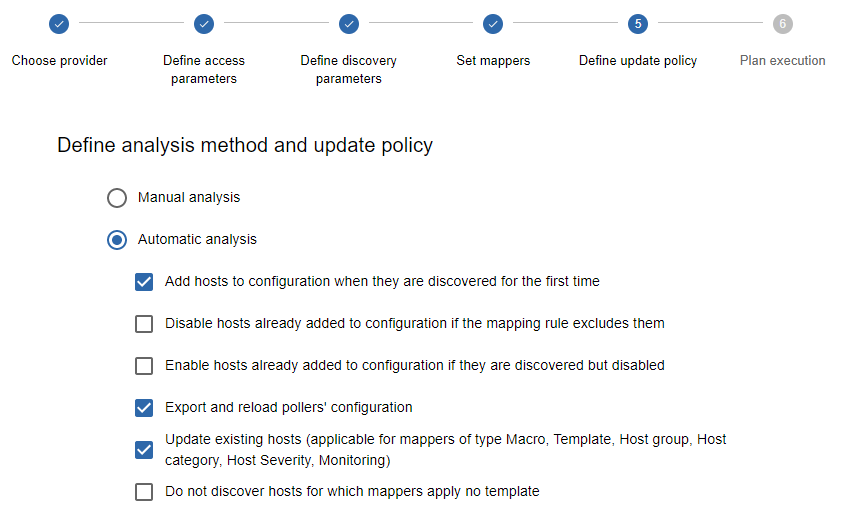
Step 5: Define analysis and update policies
-
Manual analysis: Once the discovery job is executed, you will have to choose manually which hosts should be added to the list of monitored hosts (on page Configuration > Hosts > Hosts). See Analyze the results of a discovery job.
-
Automatic analysis: The results will be processed automatically according to the selected policy (you must choose at least one):
- Add hosts to configuration when they are discovered for the first time: all hosts that are detected for the first time are automatically created in the Configuration > Hosts > Hosts page.
- Disable hosts already added to configuration if the mapping rule excludes them: resources that are already being monitored will be disabled if they match a new Exclude mapper when you run the job again.
Note: not discovered hosts (or no longer discovered hosts) will not be disabled in the Centreon configuration. Only hosts that are discovered and at the same time excluded can be disabled in the configuration (see exclusion mapper).
- Enable hosts already added to configuration if they are discovered but disabled: hosts that have already been added to the configuration but are in a disabled state will be enabled again.
- Export and reload pollers configuration: once the hosts have been created or updated, the configuration will be deployed automatically, which means that the hosts will be monitored or updated immediately, without any need for manual action.
- Update existing hosts: if you modify the mappers and run the job again, existing hosts will be updated (see Edit a discovery job).
- Do not discover hosts for which mappers apply no template: if mappers don't apply any template to some hosts, these hosts will not be included in the discovery results. If the box is unchecked, the default template will be applied to these hosts and they will be discovered.
Read the example below to better understand the scope of the first 3 policies.
Step 6: Plan execution
-
Execute immediately: the discovery will be launched right after the job is created.
-
Schedule execution: you can schedule the execution of the job in different ways:
-
Every year at defined days of defined months at a defined time
-
Every month at defined days of the month at a defined time
-
Every week at defined days of the week at a defined time
-
Every day at a defined time
-
Every x hours (at defined minutes)
-
Every x minutes
-
Click on FINISH to create the discovery job and to execute or schedule it. The job appears in the list of discovery jobs. See section Analyze the results of a discovery job.
Manage discovery jobs
Go to the Configuration > Hosts > Discovery page to access the list of discovery jobs.

The status of a job can be:
| Icon | State |
|---|---|
| Scheduled | |
| Running | |
| Saving | |
| Finished | |
| Failed |
-
If a job is in a Failed status, hover over the icon to know the reason.
-
If a job is in a Finished status, click on the arrow next to its status to analyze the result. See Analyze the results of a discovery job to know more.
Several actions can be done on jobs:
| Icon | Action |
|---|---|
| Force execution: re-execute a job | |
| Delete a job. Only the job will be deleted: the hosts you have added to the configuration will still exist. | |
| Pause a scheduled job | |
| Resume a paused job | |
| Access the results of the discovery task |
Analyze the results of a discovery job
- On the Configuration > Hosts > Discovery page, click on the arrow
next to the status of a Finished job to visualize the results.

The results show the discovered hosts. Icons allow you to identify the action that will be performed on the host:
- The plus icon means the host does not exist yet and will be created.
- The arrow icon means the host already exists and its configuration will be updated.
Note that the Property mappers are not taken into account during the update process.
-
Select the hosts you want to add to the list of monitored hosts and click the Save button. Then click the Back button to return to the Discovery page.
-
If you want, you can edit the mappers linked to this job. Click on the job to display its settings. In the Mappers section, edit the mapper with its Edit icon:
The results will be updated automatically in the preview once you click on the Save icon at the top right of the panel.
If the job was set to Automatic analysis at step 5 of the wizard and Update existing hosts was selected, the hosts will be updated when you re-run the job (see Edit a discovery job).
- If your job was set to Manual analysis at step 5 of the wizard, select the hosts you want to add or update in the configuration and click on the Save
button:
The hosts are created as well as the services linked to their host templates.
- Go to the Configuration > Hosts page: the newly created hosts appear in the list.

If the hosts you selected are not visible in the configuration, go back to the list of jobs and see if an error occured during the saving task.
-
In the following cases, deploy the configuration:
- if your job was set to Manual analysis at step 5 of the wizard
- if your job was set to Automatic analysis at step 5 of the wizard, but Export and reload pollers configuration was not selected.
The new hosts are now monitored.
Edit a discovery job
Some discovery jobs can be edited:
- if you have set the job to Automatic analysis and you have selected Update existing hosts at step 5 of the wizard, you can edit and rerun the job: the hosts discovered by the job will be updated. To rerun the job, go to page Configuration > Hosts > Discovery, hover over the job and then click Force execution.
- If a job is set to Manual analysis and its hosts are already monitored, then editing and running the job again will have no effect.
-
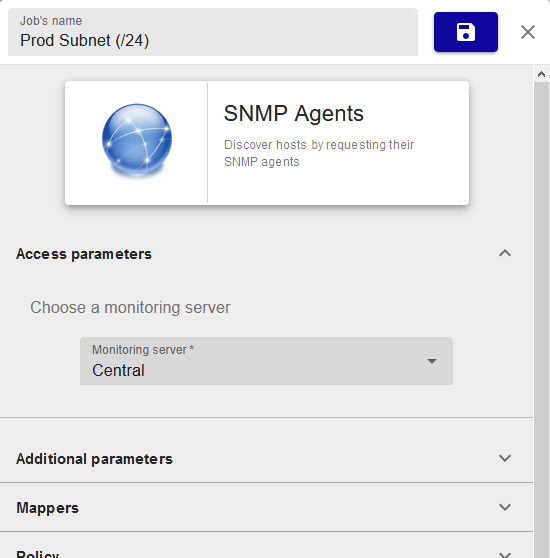
On the Configuration > Hosts > Discovery page, click on the discovery job you want. A panel appears on the right.
-
In this panel, edit the settings of the job.
If your job is set to Automatic analysis, you can update some host properties using mappers. You can:
- add templates, hostgroups or host categories
- update or define the severity (there can be only one severity)
- update or define the value of a macro (there can be only one value for a macro)
- update the monitoring server (there can be only one monitoring server)
To preserve the consistency of data and the traceability of actions, the name, alias and IP address of the host cannot be updated (i.e. data brought by Property mappers).
When you edit mappers, if you selected Update existing hosts at step 5 of the wizard, the hosts will be updated. If you did not select this option, running the job again will only add new hosts to the monitoring: existing hosts will not be updated.
If the autodiscovery module discovers hosts whose names are already used by hosts that have previously been created manually on page Configuration > Hosts > Hosts or with the API or CLAPI, those existing hosts will also be updated by the autodiscovery module.
- Click on the Save icon at the top right of the panel:
How to use mappers
Mappers allow you to:
-
Define how the future hosts will be configured, by mapping a value discovered on the host (an attribute) to a field in Centreon. The list of attributes depends on the discovery provider.
-
Include/exclude hosts from the list of results.
There are nine types of mappers:
| Mapper | Action |
|---|---|
| Property | Define a label (name, alias, IP address) |
| Macro | Define a custom macro for the host |
| Template | Add host templates (the template from the plugin pack is added automatically) |
| Host group | Link hosts to a host group |
| Host category | Link a host to a category |
| Host severity | Prioritize the host according to a severity |
| Monitoring | Choose from which monitoring server the host will be monitored |
| Exclusion | Exclude a subset of hosts based on their attributes (see the example below) |
| Inclusion | Include a subset of hosts that have been excluded by an exclusion mapper |
For all those mappers, conditions can be applied to choose whether or not the mapping will actually occur. Operators can be: is equal to, is different from, contains and does not contain.
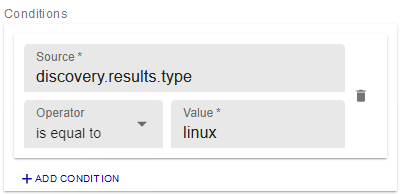
If you include several conditions inside a mapper, all the conditions must be fulfilled in order for the mapper to apply.
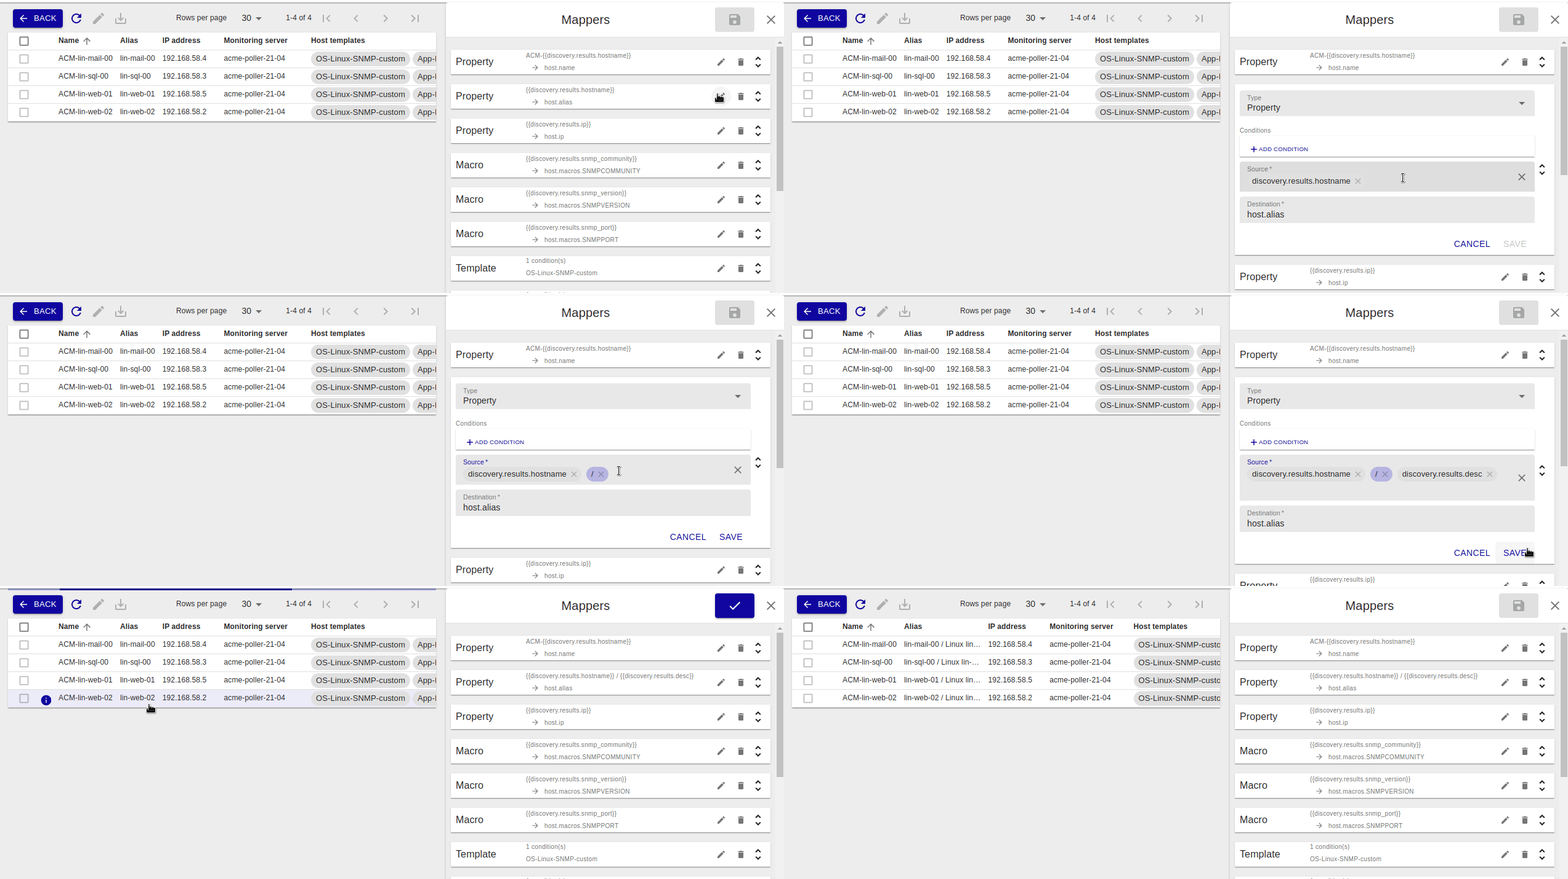
From version 21.04, mappers Property, Macro, Host group and Host category support concatenating either discovery attributes or custom strings.
Add a mapper
-
In the job wizard at step four, or on the edition panel in the Mappers section, click on +ADD MAPPER.
-
Select the type of mapper from the drop-down list, and fill every required field.
-
Click on SAVE to add the mapper.
Edit a mapper
-
In the job wizard at step four, or on the edition panel in the Mappers section, click on the Edit icon:
-
Edit the fields you want, or even the type of mapper. See Edit a discovery job.
-
Click on SAVE to save the mapper.
Delete a mapper
- In the job wizard at step four, or on the edition panel in the Mappers
section, click on the Delete icon:
A popin window will ask you to confirm the action.
- Click on DELETE to delete the mapper.
Types of mappers
Property
The Property mapper is used to set common properties of a host like its name, alias or IP address. Those three properties are mandatory.
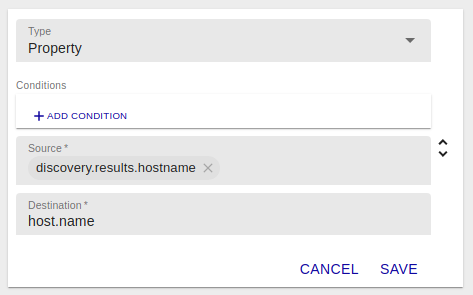
The Source list allows you to choose between credentials, parameters or discovery result attributes.
The Destination list allows you to define to which property the value will be mapped.
Macro
The Macro mapper is used to create custom macros to be defined on the host.
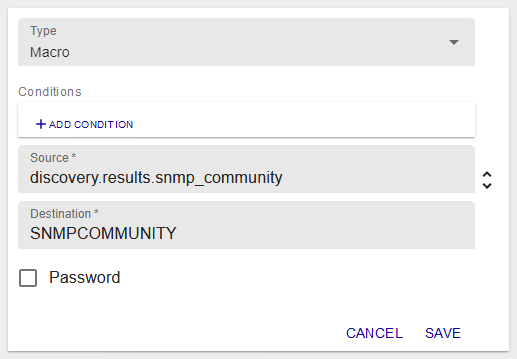
The Source list allows you to choose between credentials, parameters or discovery result attributes.
The Destination is a user defined text field.
The Password checkbox defines if the macro will be created as a password macro or not.
Template
The Template mapper is used to add a template to the host. You can add as many Template mappers as you want (one template per mapper).
As in the example below, you can define a template according to conditions (here, the OS-Linux-SNMP-custom template is applied to Linux hosts).
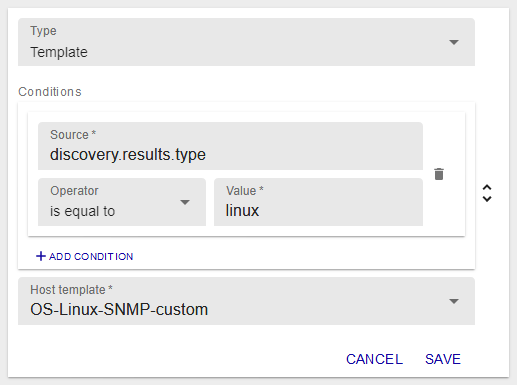
The Host template list allows you to choose among all host templates defined in the configuration.
Host group
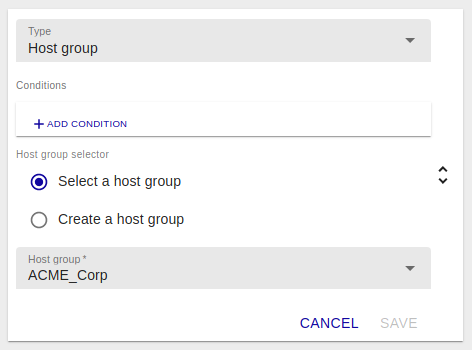
From version 21.04, the discovered hosts can be linked to host groups. There are two ways of doing it.
-
Select an existing host group from the dropdown list.
-
Create host groups on the fly: both custom strings and discovery attributes can be used and concatenated to compose the host group's name.
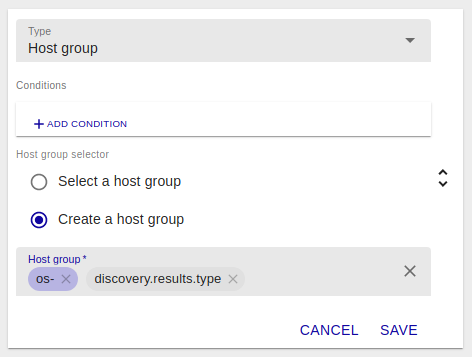
In this example, when discovering Linux servers, the
os-linuxhost group will be created.If a host group already exists with the same name, it won't be created again, the host will simply be linked to it.
Host category
From version 21.04, the discovered hosts can also be categorized using host categories. Again, there are two ways of doing it.
-
Select an existing host category from the dropdown list.
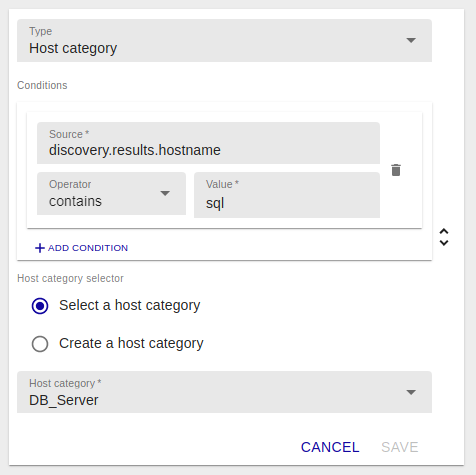
-
Create host categories on the fly: both custom strings and discovery attributes can be used and concatenated to compose the name of the category.
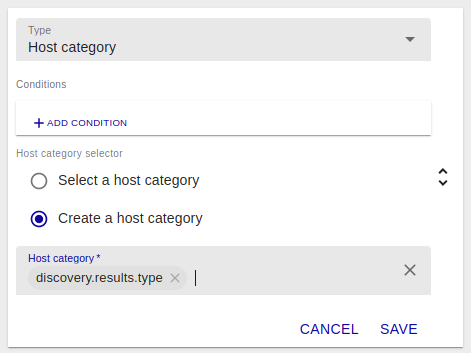
If a host category already exists with the same name, it won't be created again, the host will simply be linked to it.
Host severity
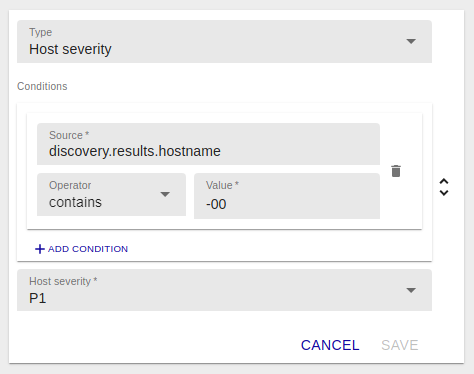
From version 21.04, discovered hosts can also be prioritized using host severities. Since severities are not just a simple label but also have a numeric level, they can't be created on the fly, and can only be selected from the dropdown list.
Monitoring
The Monitoring mapper is used to choose from which monitoring server the host will be monitored.
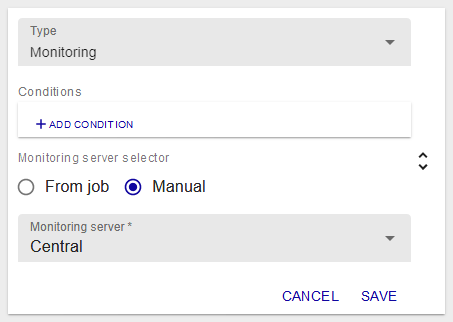
The Monitoring instance selector radio buttons allow you to choose between the monitoring server defined in the job or from the ones available on the Centreon platform.
This mapper is mandatory.
Exclusion
The Exclusion mapper is used to exclude a subset of hosts from the results list.
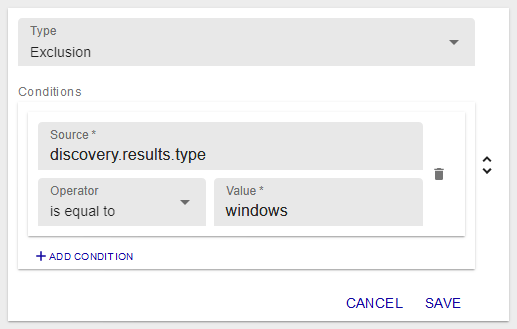
The mapper uses hosts attributes as conditions to exclude them. In the example above, Windows hosts will be excluded from the results list.
Inclusion
The Inclusion mapper is used to include hosts that would have been excluded by an Exclusion mapper. This means that Inclusion and Exclusion mappers must be defined in the right order.
In the example below, let's say that all hosts have been excluded from the results list (with an Exclusion is different from 1 mapper, for example). This Inclusion mapper will include all Linux hosts in the results list.
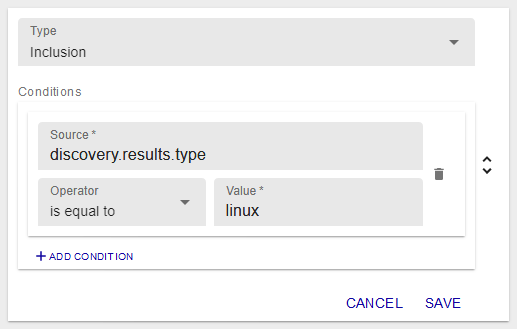
The mapper uses hosts attributes as conditions to include them.
Advanced attributes
Some attributes retrieved by discovery jobs, called advanced attributes, consist of a list of objects that contain pairs of properties. You can use them as source for Macro, Host group and Host category mappers, and in conditions for any type of mapper. In Inclusion and Exclusion mappers in particular, you can filter the results of the discovery according to a specific pair of values.
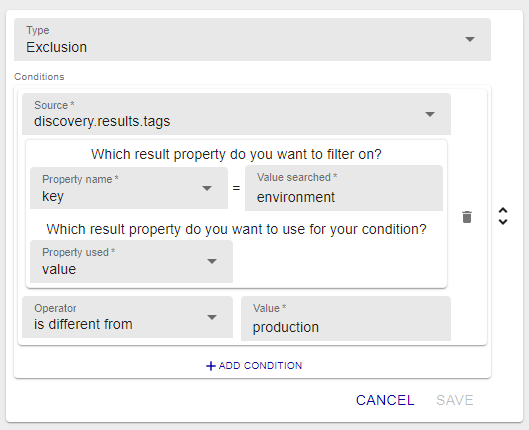
Example of advanced attribute describing a host: cloud tags. Your hosts are hosted in the cloud. They have an advanced attribute named tags. For an instance with the tags os: windows and environment: production, the discovery job will receive the data in the following way:
"tags": [{"key": "os", "value": "windows"}, {"key": "environment", "value": "production"}]
Examples of use with mappers:
-
In the tags attribute, the environment key can have the following values: production, preprod or test. You only want to monitor production instances, i.e. those for which the value production matches the key environment. Use an Exclusion mapper and configure it as follows:
-
You want to sort hosts into host groups. In the example below, machines will be sorted into hostgroups according to their OS, e.g. all machines whose property os equals Windows will belong to the hostgroup Windows.
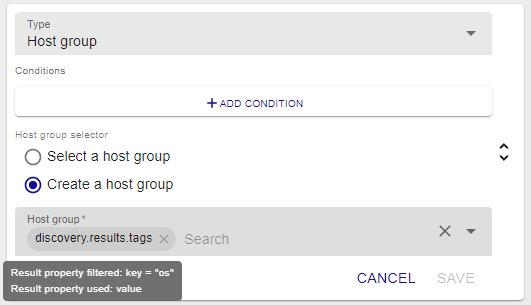
First add a Hostgroup mapper and select Create a host group. Then select the advanced attribute (in this example: tags) as the source for the mapper, and configure it as shown below:
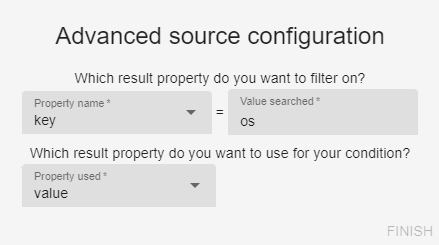
The value of the property is displayed in a tooltip. Use Shift+click on the advanced attribute to edit its properties:
Examples
Dynamically update your configuration
Situation
Having a VMware vCenter with virtual machines dynamically added, started and stopped.
Objective
Update the Centreon configuration according to the states of the virtual machines.
Create the right job
From the Host Discovery main page, add a job starting by selecting the VMware VM provider.
Define the monitoring instance from which you want to do the discovery. For this particular provider, it has to work with the discovery parameters on which you define the information related to the Centreon VMware Connector access (hostname/ip and port).
In most cases, you will install the Connector on the monitoring instance, so the access will be localhost and default port 5700.
Let's now define the mappers and the update policies to match our needs:
-
First needs:
- Add new (or not yet added) virtual machines, (1)
- Exclude virtual machines that are not started. (2)
-
Second needs:
- Disable the virtual machines that are stopped, (3)
- Re-enable the virtual machines that are started (after being stopped). (4)
This will first result in an Exclusion mapper with the following configuration:
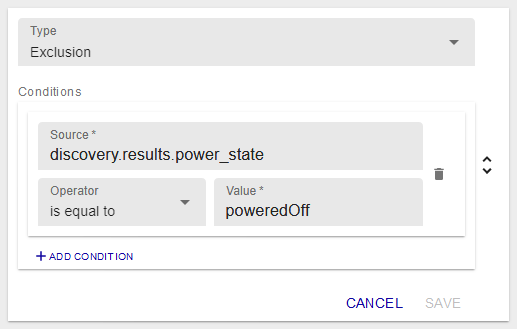
This way, all powered off virtual machines will not be part of the processed result. Those will not be added (2).
In addition to this mapper, choose the automatic analysis with all the update policies as below:
With the first policy, the virtual machines part of the processed result will be added (1).
With the second one, virtual machines that were added at some point (because in a powered on state) will be disabled in the Centreon configuration if they happen to be powered off (3).
The last one will enable the virtual machines that are once again in a powered on state (4).
Of course, the last two policies work better if the job is scheduled to run more than one time.
Note: if a virtual machine happens to be deleted, it will not be deleted (or even disabled) from the Centreon configuration. Only hosts that are discovered and excluded at the same time can be disabled in the configuration (if the policy is chosen).