Configure
Administrate users rights
There are two kinds of administrator: Centreon admins and Map admins.
On a fresh install, only Centreon admins exist.
Centreon admins may grant Map admins privileges through ACL groups defined in Centreon.
Any user contained in that group then becomes a Map administrator.
Manage Map administrators
To grant Map administrator privileges on an ACL group:
Go to Preferences > Preferences, and then select the Admin tab.
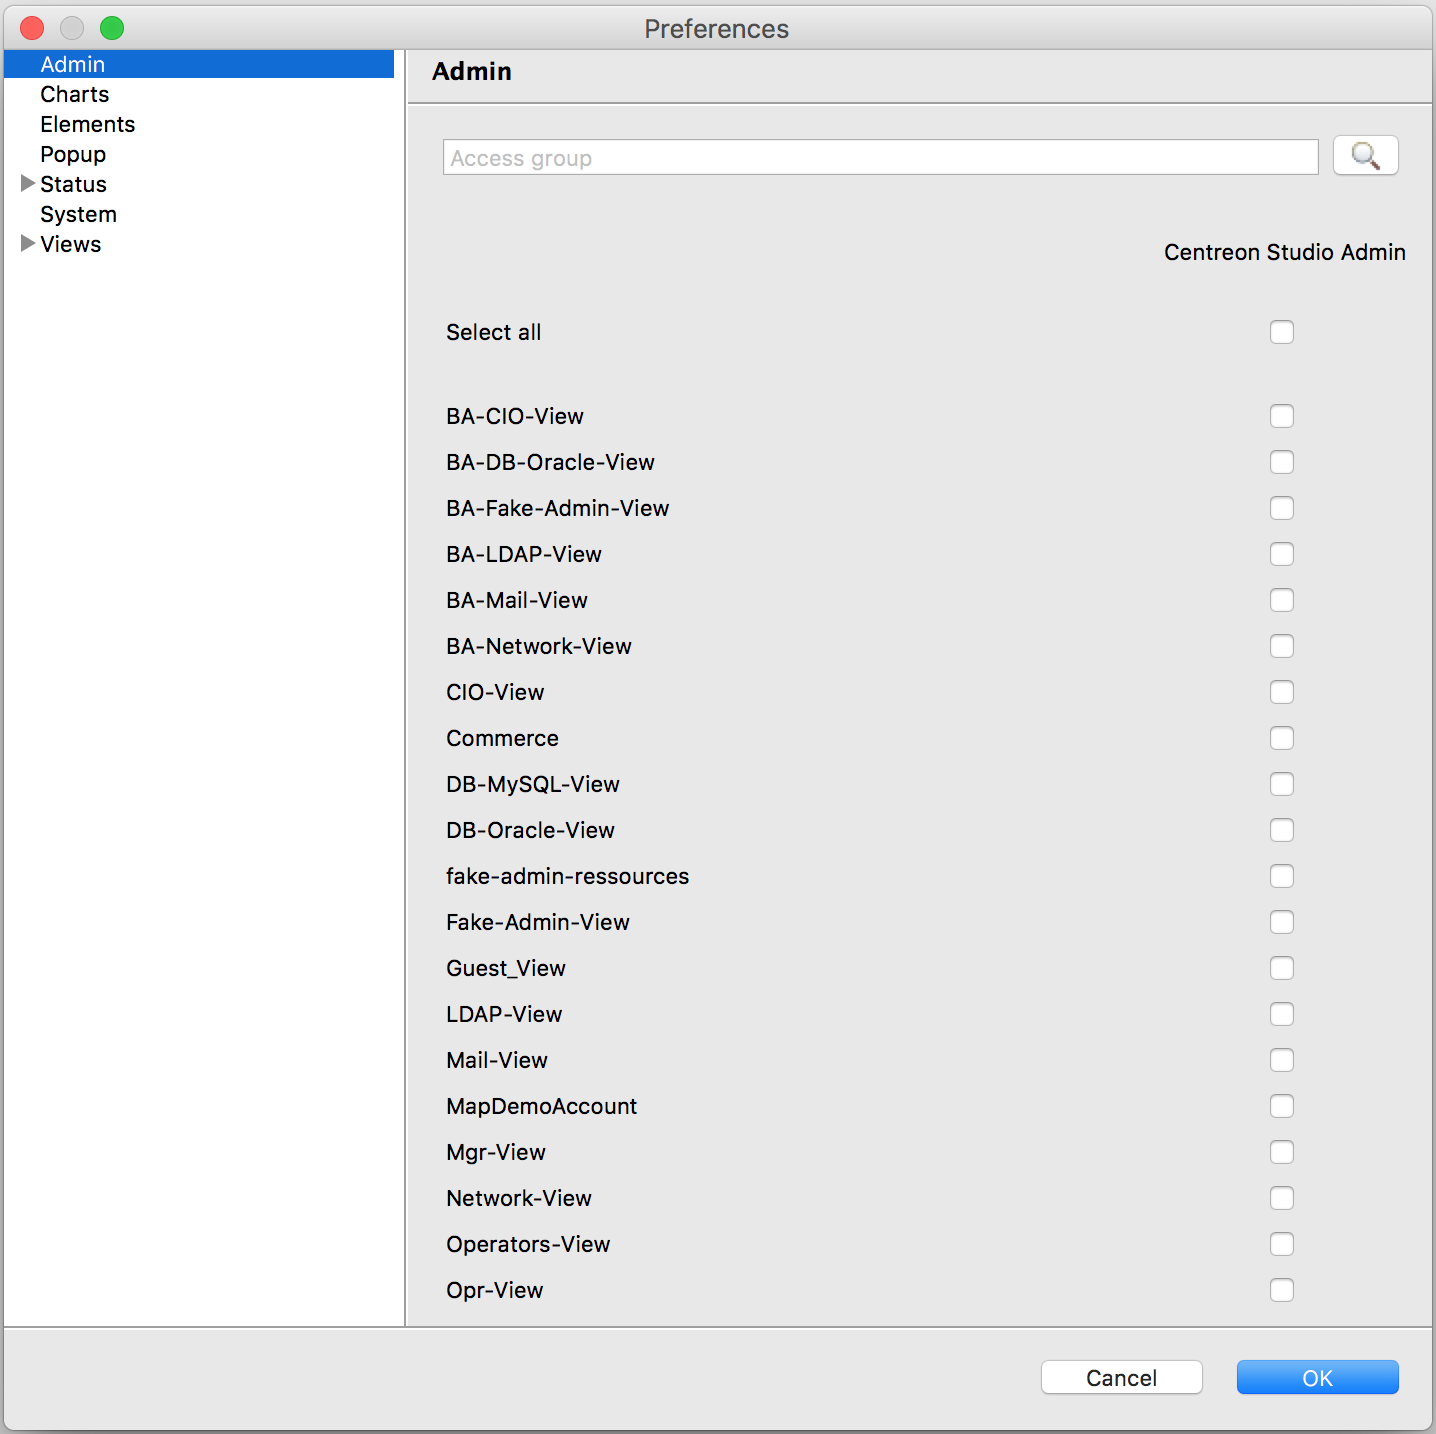
Give access on views to other users and manage their privileges
By default, non-admin users have no access to views, and have no privileges.
Administrators can grant these accesses and privileges to specific sets of users through ACL groups.
ACL groups can be allowed to view, create, modify and delete one or more views independently.
Go into Preferences > Preferences and then select the Views > ACLs tab.
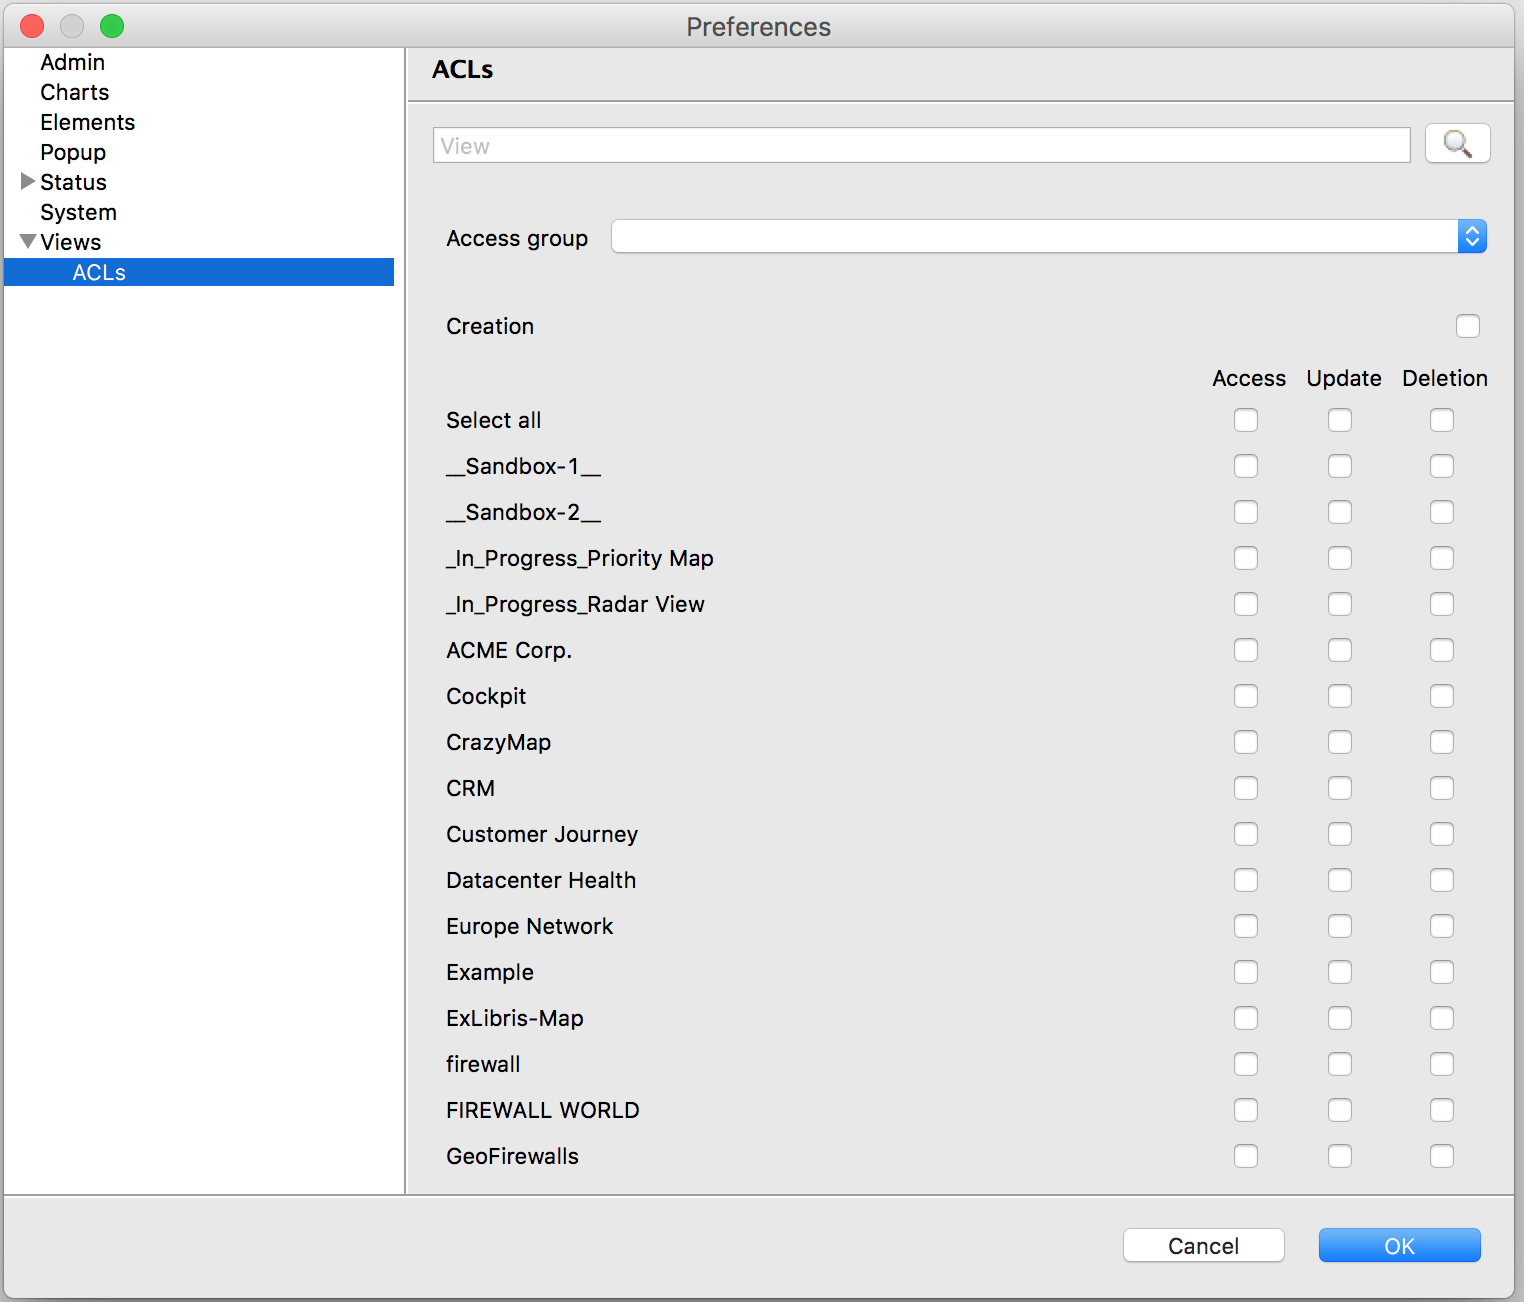
From the list, select the ACL group you want to configure. Then, for each view, define the specific rights to attribute.
GeoViews
Two simple rules apply on this kind of view:
- Any user accessing the Monitoring > Map page will be able to see all the geographic views created
- Users that have the "Creation" privilege (through the ACL group on the Centreon Map desktop client) have all privileges on geographic views.
Load disabled resources (or not)
Mistakes when editing configuration files can lead to malfunctions of the software. We recommend that you make a backup of the file before editing it and that you only change the settings advised by Centreon.
You can decide whether to load disabled resources into Centreon Map desktop client. If you do (which is the default configuration), all disabled resources will appear in the resource list. You will also be able to use them in your views.
They will have no status and appear as shown in the following screenshot:
You may change this configuration by opening the file
/etc/centreon-studio/studio-config.properties and adding the following
line:
resource.load.enabled.only=true
Then restart the Centreon MAP server:
systemctl restart centreon-map
Define views & status computation parameters
Centreon Map server gives you the possibility to customize how this inherited status is computed and rendered in views. You may use the following parameters to adapt the behavior of inherited status computation to your use case.
| Parameter | Possible value | Default value | Description |
|---|---|---|---|
| drilldown.useHardState | true or false | false | Only use hard state value for inherited status propagation |
| drilldown.ignoreElementInDowntime | true or false | false | Do not propagate status for resources in downtime |
| drilldown.ignoreElementAcknowledged | true or false | false | Do not propagate status for acknowledged resources |
| drilldown.ignoreSeveritySuperior | integer | 0 | Do not propagate status for resources having severity superior to this value |
| gate.useResourcesAccess | true or false | true | Should Centreon Map consider resources ACL when calculating inherited status of view content |
The following parameters can be configured in
/etc/centreon-studio/studio-config.properties.
If you add, remove or update a parameter, make sure to restart centreon-map.
What's an inherited status ?
An inherited status is a Centreon Map custom status associated with some objects that is based on the worst status of its children; here are the rules:
- A host has two statuses: its own status (up/down/pending) and an inherited status that is based on the worst state of its services.
- A hostgroup only has an inherited status corresponding to the worst status of its children (hosts, services)
- A servicegroup has only an inherited status: the worst status of its children (services)
- A container has only an inherited status: the worst status of its children (hosts, services, meta-services, hotsgroups, servicegroups, BA, widgets)
Inherited status customization
Centreon Map server gives you the possibility to customize how this inherited status is computed and rendered in views. You may use the following parameters to adapt the behavior of inherited status computation to your use case:
Specificity of gate.useResourcesAccess: Setting this parameter to "false" may highly improve Centreon Map performance. Here is why:
- gate.useResourcesAccess = false: all users see the same status and same resources in views, irrespective of the ACL resources they have, they are ignored. In that case, be careful who you're giving access to views
- gate.useResourcesAccess = true: users see different status and views regarding resource ACLs (decreased performance because you need to have one instance of each view for each user)
To configure these parameters, you need to edit the following Centreon MAP server configuration file (modify or add missing parameters), then restart centreon-map:
vi /etc/centreon-studio/studio-config.properties
systemctl restart centreon-map
Change link colors
This property will only be applied to the user modifying it on the desktop client.
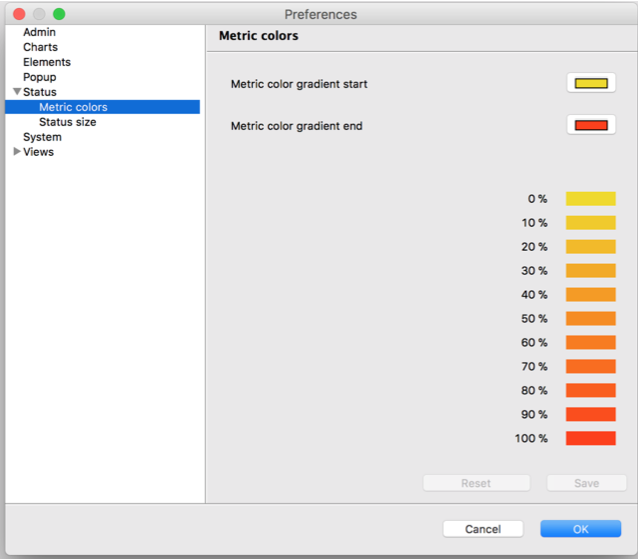
You can change the start and end color of a link based on a metric. These colors represent a scale from 0% to 100% for the metric(s) associated with the link.
Understand how resources synchronization works
Each time you make changes to Centreon's configuration and push the configuration to any poller, the configuration is scanned and updated on Centreon MAP.
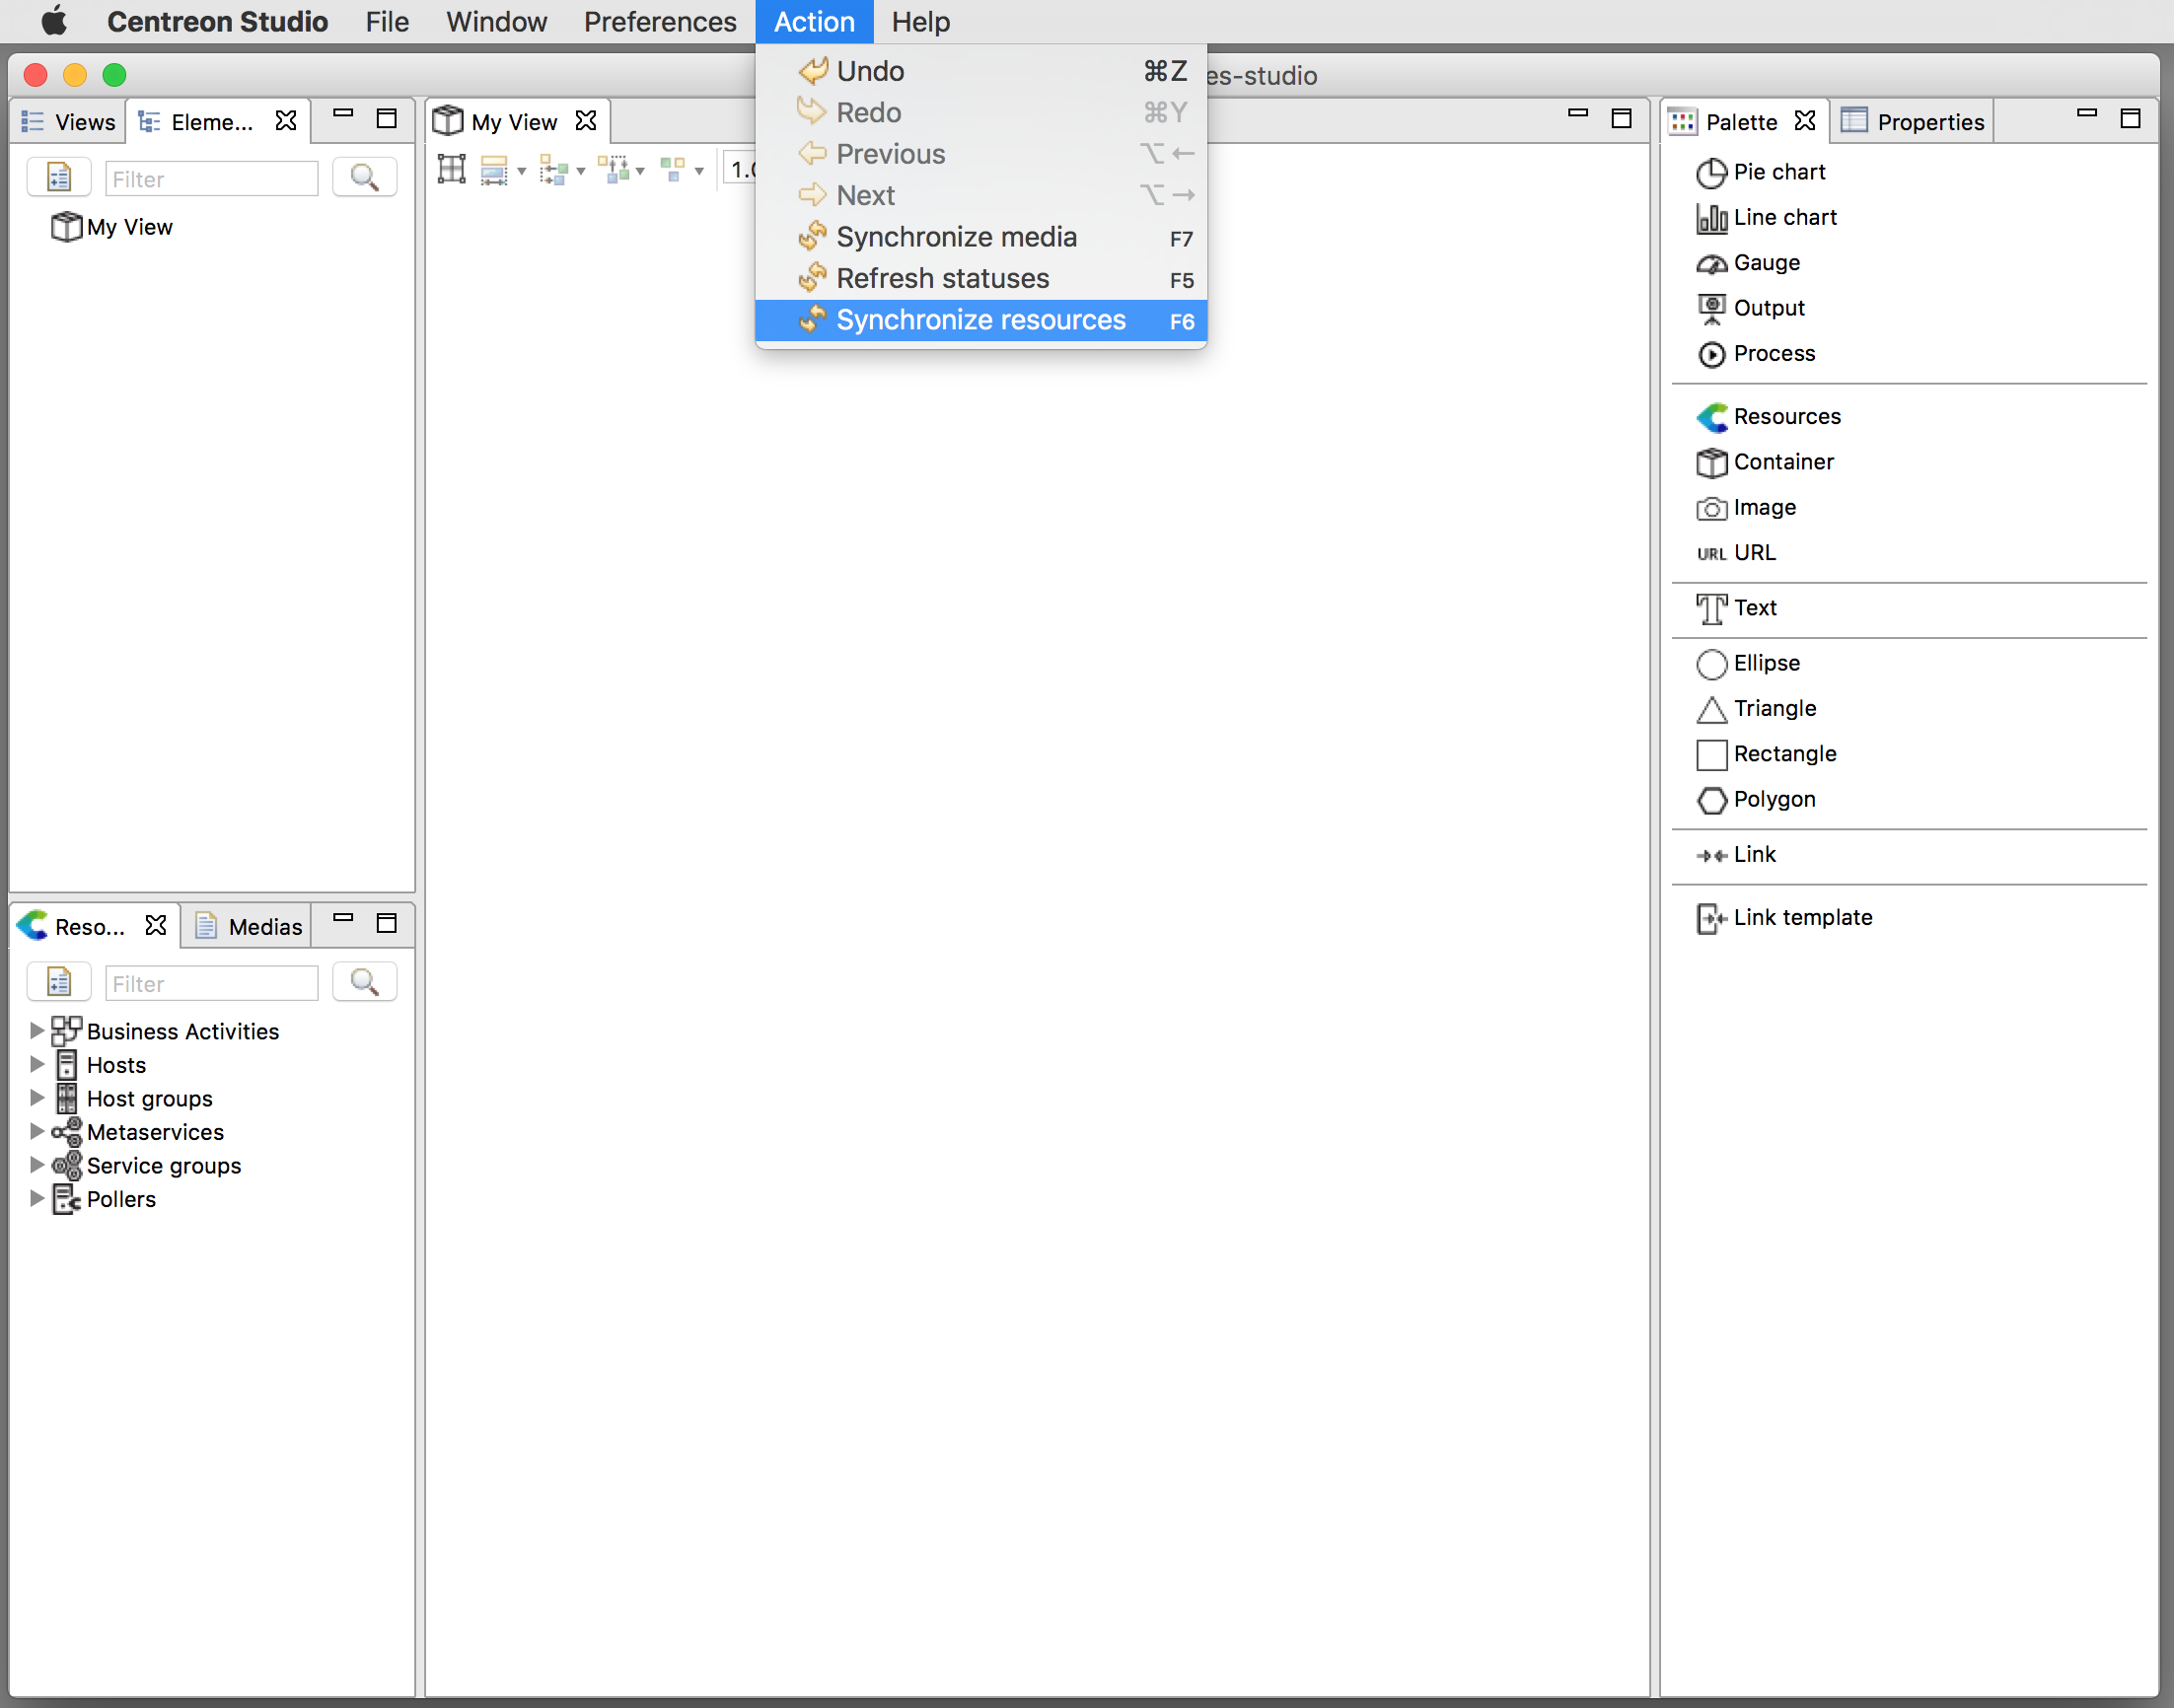
However, if you make any changes (add/delete/update) to Centreon's resources and want these changes to be immediately synchronized on your Centreon MAP without pushing the configuration, you can force a resource synchronization from Centreon MAP's desktop client through the following menu: Action > Synchronize resources.
This operation may take a few seconds. A pop-up will tell you when the synchronization is complete.
Highlight problems
This property will only be applied to the user modifying it on the desktop client.
You can change the size of elements according to their status as a way of highlighting a problem. This only works when elements are expressed in the geometric style.

To use this feature, edit the Status size properties in the desktop Preferences. Go to Status > Status size to configure it globally.
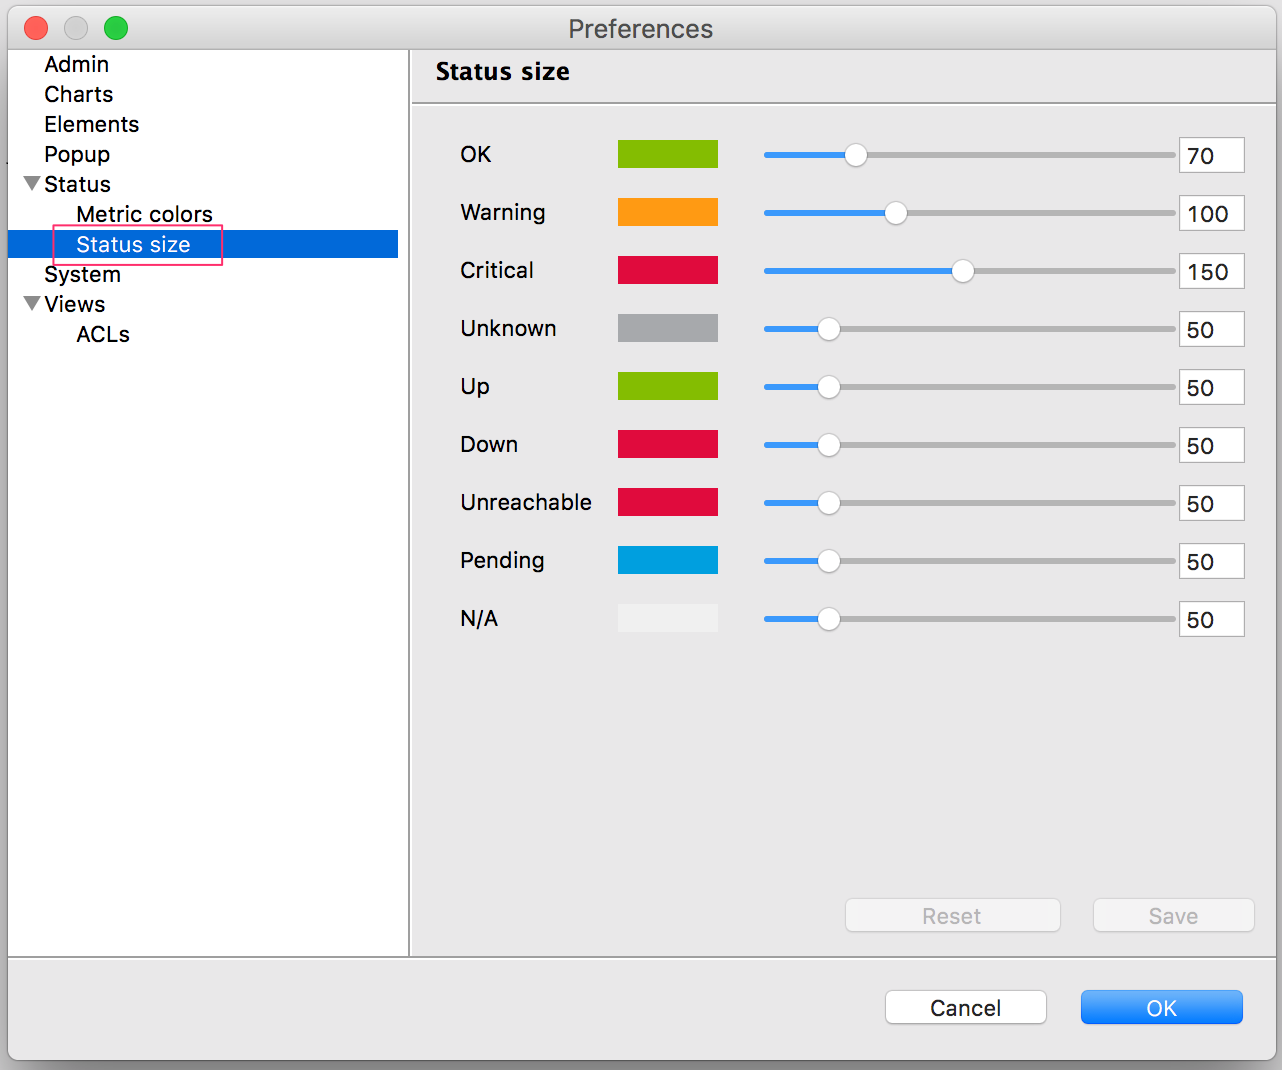
Geo view configuration
Configure tiles provider
You can choose the tile service provider or even add your own provider in Administration > Extension > Map | Options. By default, Centreon Map geoviews come with Open Street Map and Mapbox.
Please refer to this link to understand the Open Street Map Tile usage policy.
To change the tile provider, select one in the list and click Save.
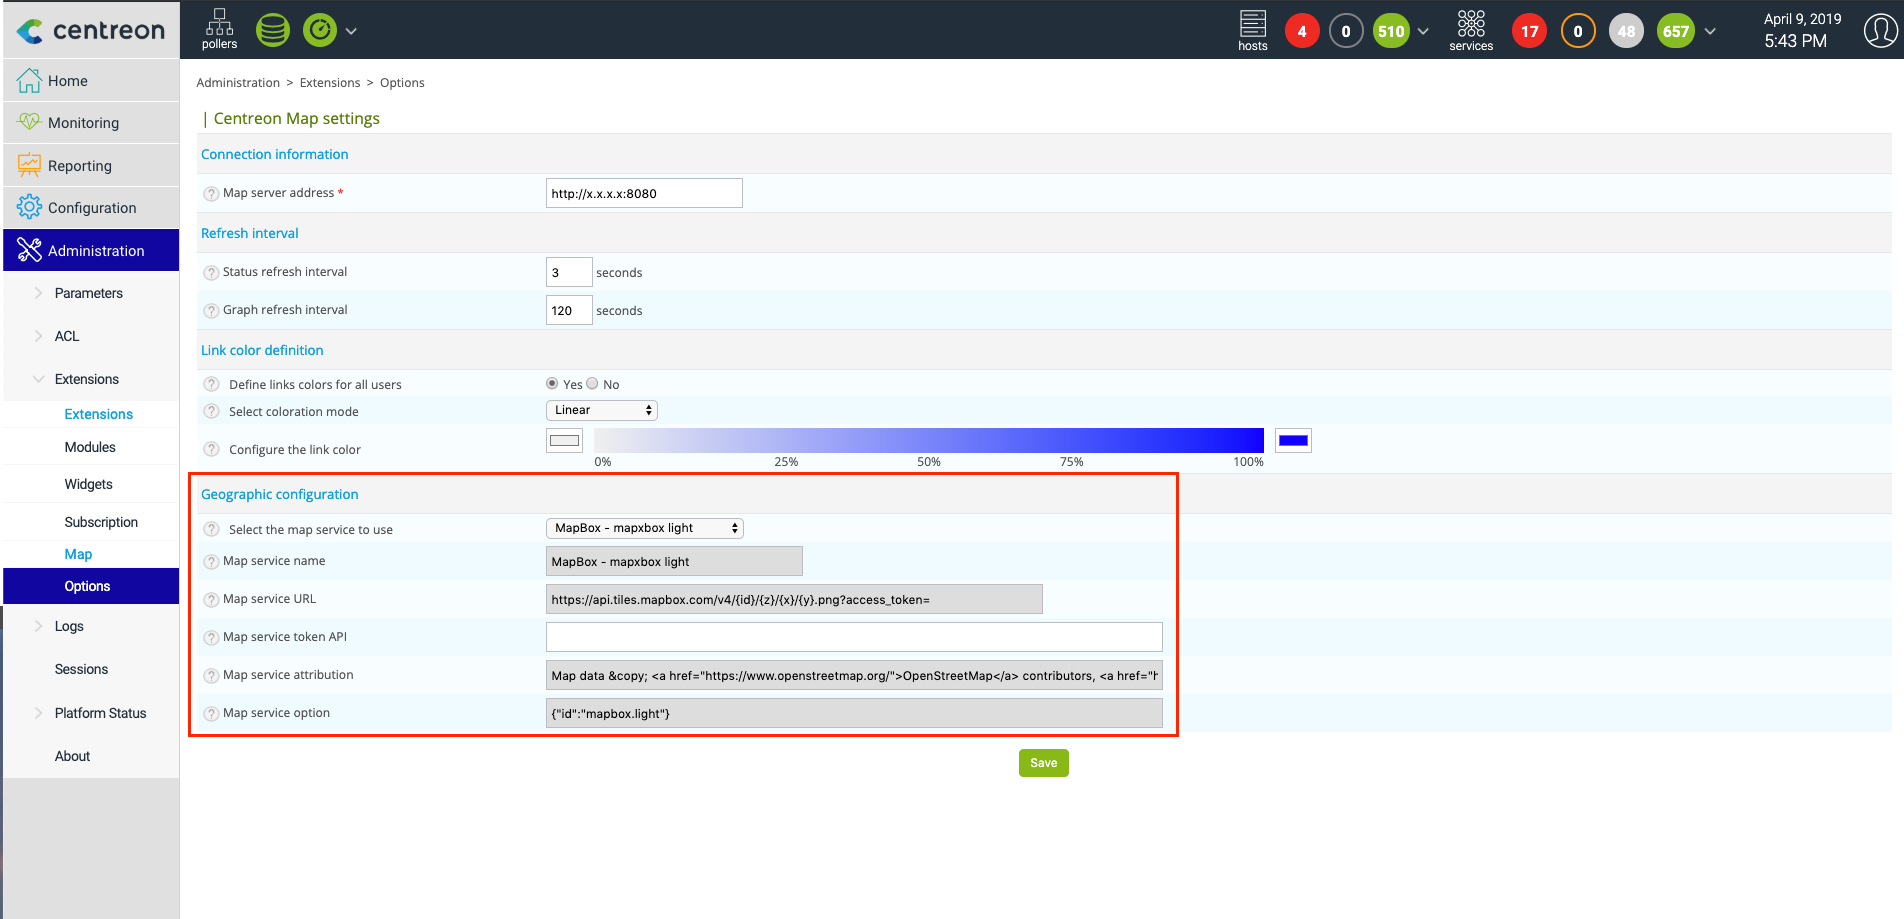
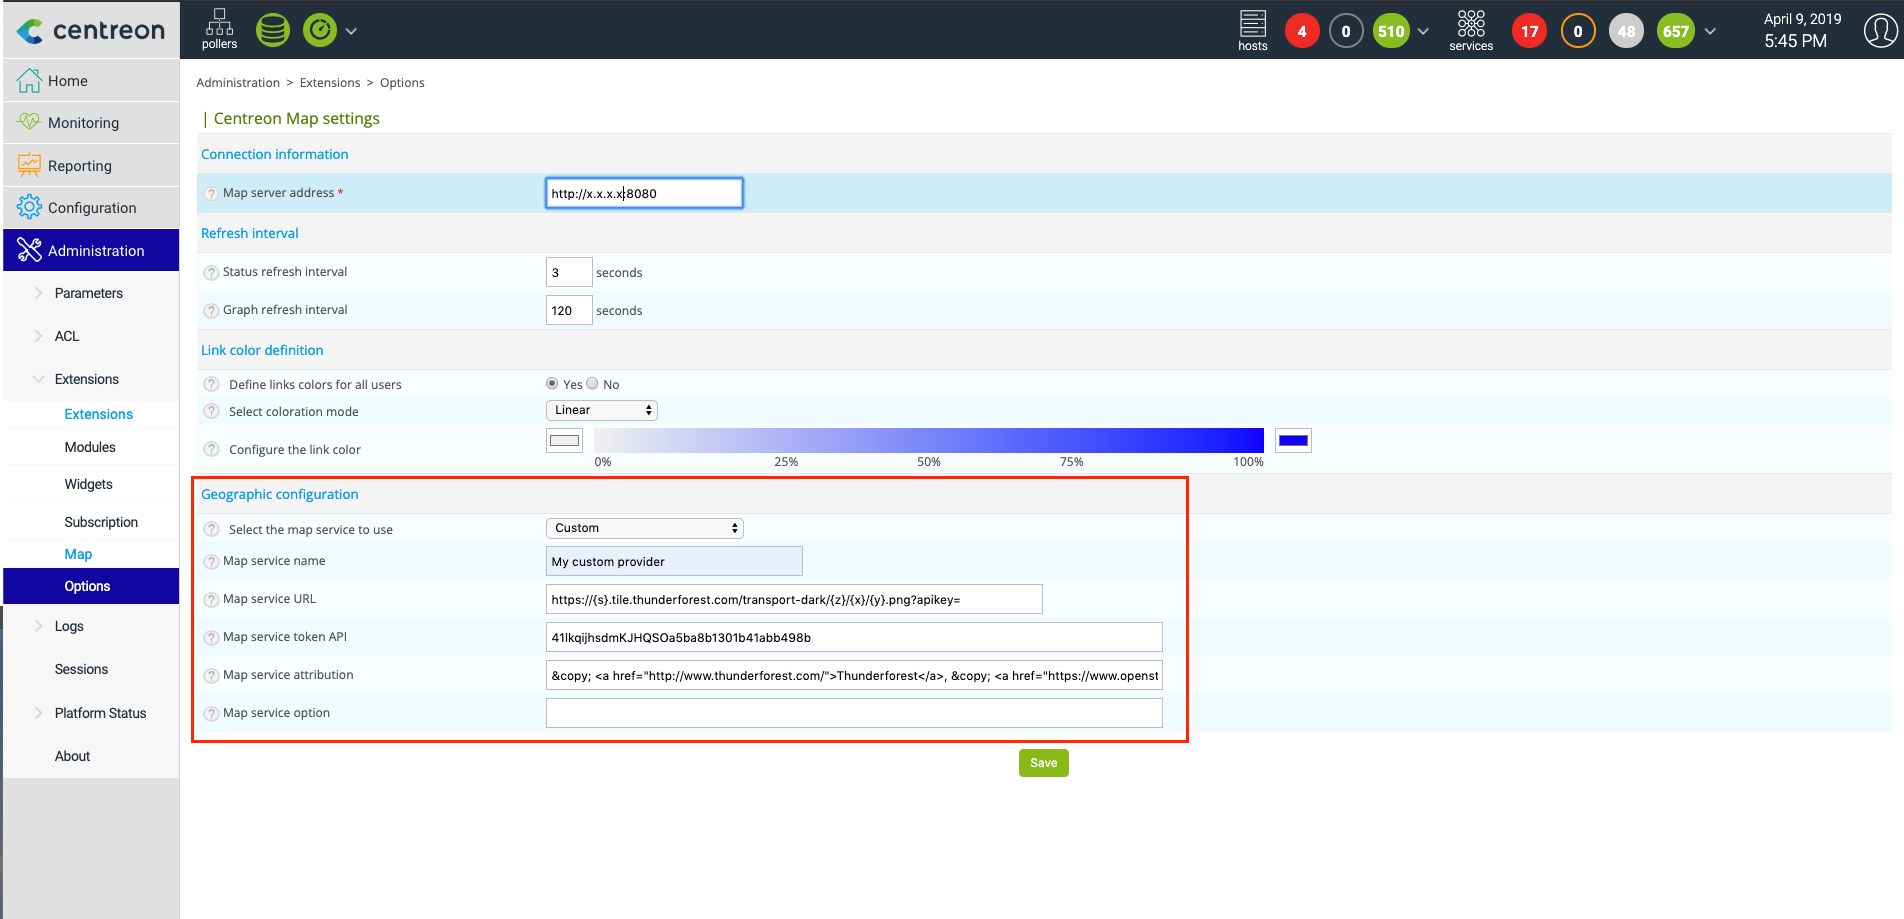
If you want to use your own Tile service provider, if for example you
have an internal Open Street Map server, go to
Administration > Extension > Map | Options and choose the "Custom" style.
Define the parameters needed and then save.
Configure data layers
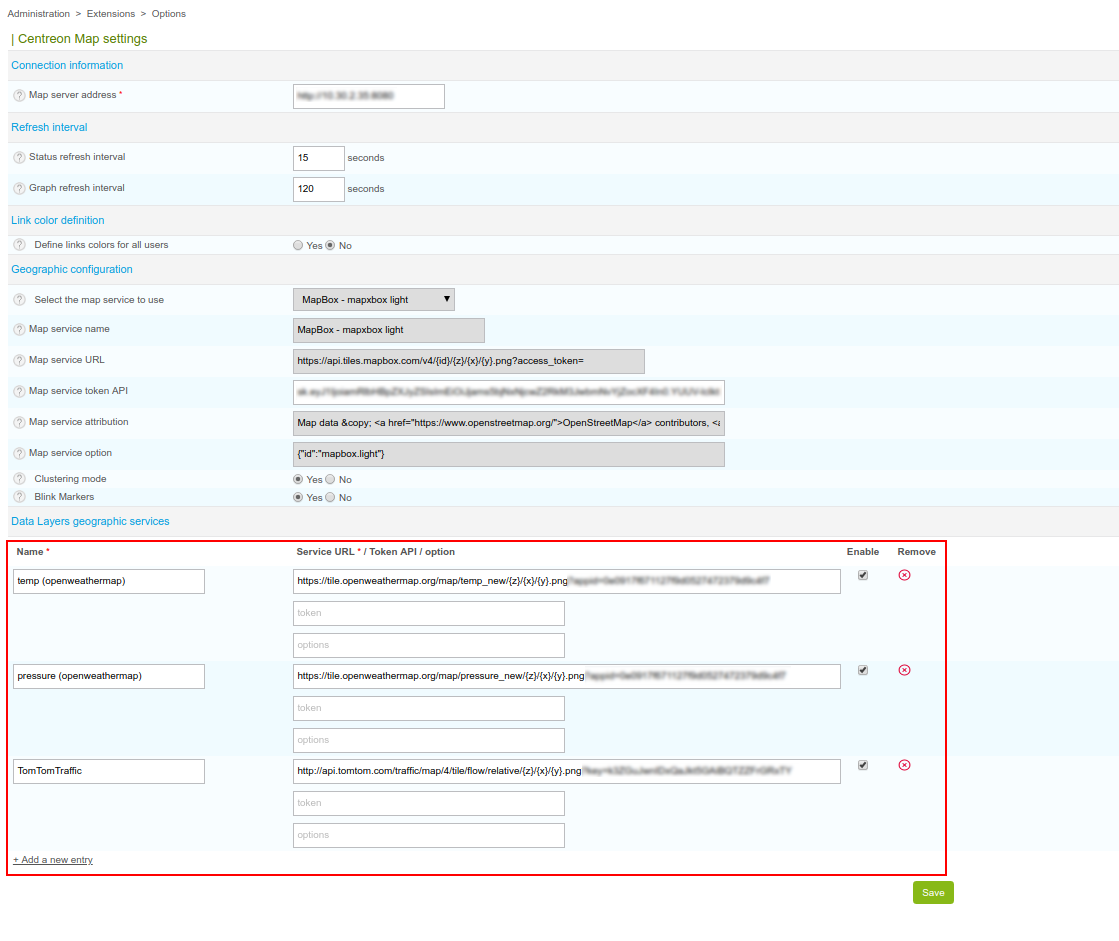
You can add any external data layer to Centreon GeoView by going to
Administration > Extension > Map. The layer mechanism is the same as that of the
tile provider: we are compatible with tiles map (TMS).
Most of the time, the data layer configuration will consist of:
- Defining the URL,
- Setting your token,
- Adding any extra parameters in JSON format.
Create and link a Mapbox account
Mistakes when editing configuration files can lead to malfunctions of the software. We recommend that you make a backup of the file before editing it and that you only change the settings advised by Centreon.
If you want to be able to have a geographic background on standard views and/or use it as a tile service provider in GeoView, you need to have a Mapbox account and link it to your Centreon Map.
Create an account
Mapbox is a service that generates attractive and customizable maps. You can use Mapbox with Centreon MAP for free by:
- Creating an account on Mapbox.
- Retrieving a private token from your Mapbox account and add it to the configuration of the Centreon MAP Server (or during installation).
During token creation, you are asked to select properties. Select:
- Public scopes: styles:read and styles:tiles
- Secret scopes: styles:list
Your account allows free limited use of the service up to 50k tiles/month.
A tile is an image used to compose the geographic view.
If you need more tiles, you can upgrade your account (pricing).
Configuration on the Centreon MAP server
Insert the token in the file /etc/centreon-studio/studio-config.properties:
##### GEO
mapbox.token=sk.xxxxxxxx
Then restart centreon-map:
systemctl restart centreon-map