Using the v2 API with Postman
This page describes how to use the v2 API for Centreon Web with Postman.
Create a Postman collection from the OpenAPI definition
In order to manipulate the API more efficiently, or just understand how it works, there is nothing handier than a Postman collection.
Import the OpenAPI definition
From your workspace, click the Import button.
![]()
Go to the Link tab and enter the URL to the OpenAPI definition from GitHub:
https://raw.githubusercontent.com/centreon/centreon/refs/tags/25.10-latest/centreon/doc/API/centreon-api.yaml

Click Continue and adjust some of the default parameters:
- Select only Collection as an import method,
- Select Example for Request parameter generation, as it will bring more context on path variables or query parameters,
- Select Tags for Folder organization, as it will arrange the collection as in the documentation.
Then click Import and wait a few seconds for the process to be done.

Add an environment
To be able to communicate with your platform, the collection will use environment variables to define access information and credentials.
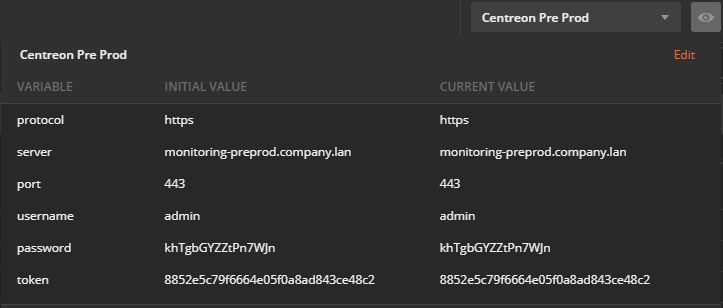
From your workspace, click the Manage Environments icon.
![]()
Click Add and set the variables as below with your platform information:
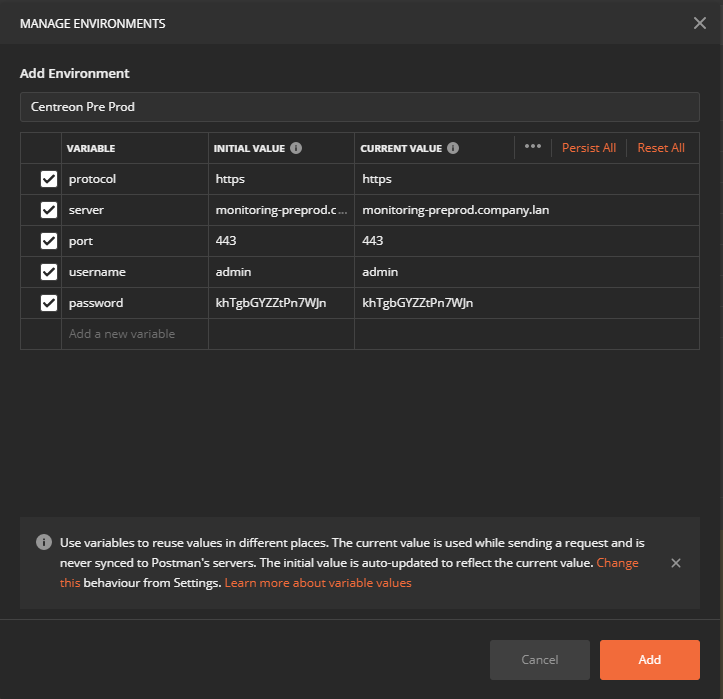
Then click Add, and select it in the environments list.
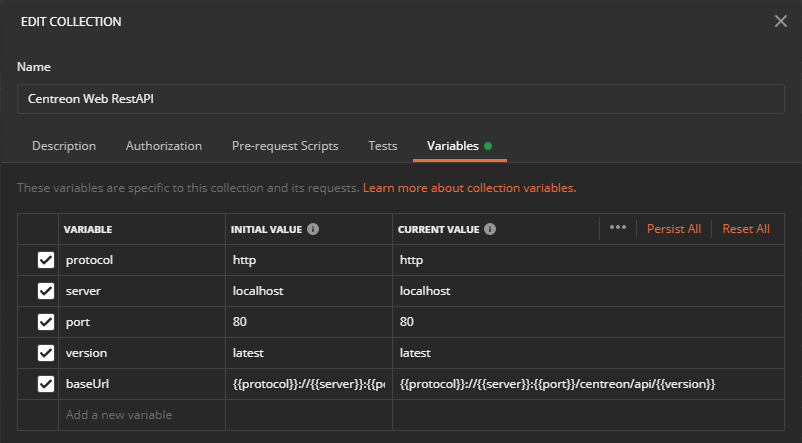
The API version is not set in the environment variables. It's more of a collection variable. It can be changed directly in the collection by editing it.
In the Variables tab, change the version value to either "latest" or your
v<major>.<minor>version number, e.g. "v25.10".You can obtain your "major.minor" version number using the following command:
curl -s http://127.0.0.1:80/centreon/api/latest/platform/versions | jq '.web 'Here is an example of output for this command:
{ "version": "25.10.1", "major": "24", "minor": "10", "fix": "1" }
Other variables will be overloaded by environment variables.
Edit the Login request
To make the Login request, use the previously defined credentials, and retrieve the API token from the response. It needs to be edited.
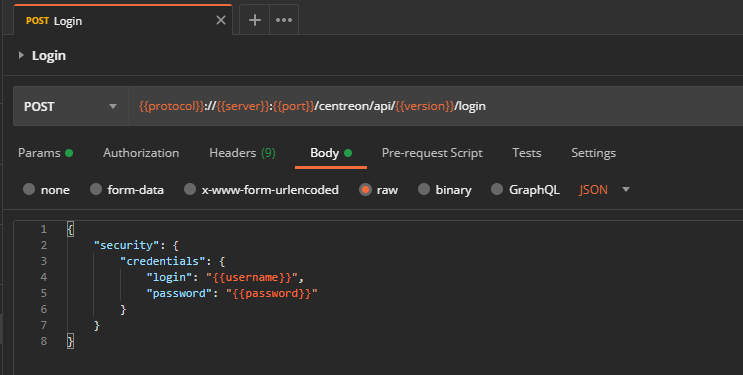
From the collection, select the Login request from the Authentication folder.
In the Body tab, replace the login and password values with the environment
variables {{username}} and {{password}} as below:
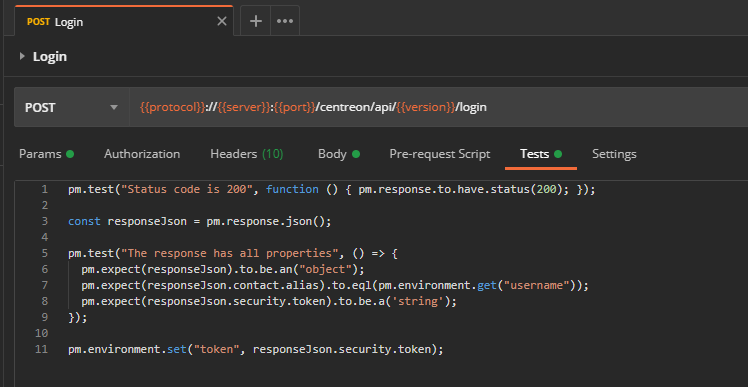
In the Tests tab, add the following code:
pm.test("Status code is 200", function () { pm.response.to.have.status(200); });

const responseJson = pm.response.json();

pm.test("The response has all properties", () => {
  pm.expect(responseJson).to.be.an("object");
  pm.expect(responseJson.contact.alias).to.eql(pm.environment.get("username"));
  pm.expect(responseJson.security.token).to.be.a('string');
});

pm.environment.set("token", responseJson.security.token);
Then click Save or use the shortcut Ctrl+S.
Use the API token
Once saved, Send the Login request.
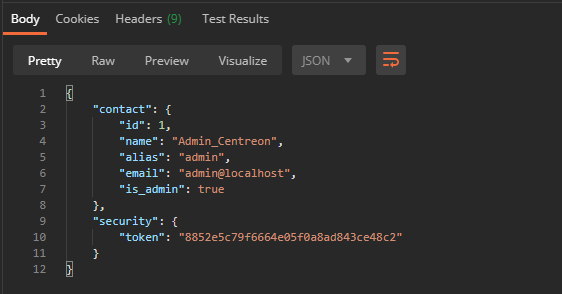
If successful, it will add a new token environment variable filled with the token retrieved from login.
To use it in all the requests, edit the collection.
In the Authorization tab, choose API Key type and fill the Key field
with X-AUTH-TOKEN and the Value field with {{token}}.
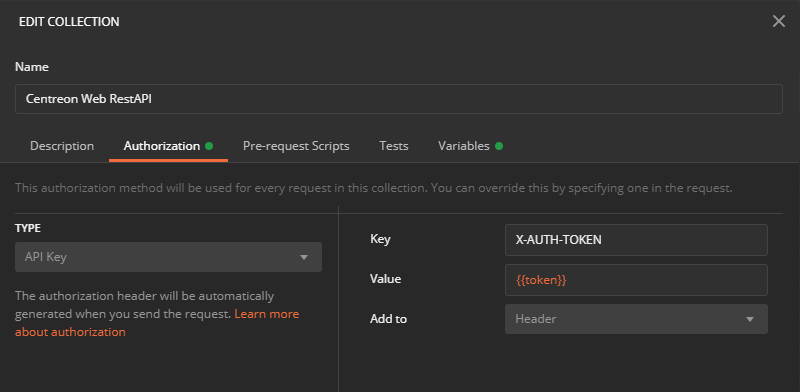
Make sure it will be added to Header.
Then click Update.
Make requests
Now that a valid token is stored, you can execute requests on other endpoints.
Uncheck unused query parameters or fill them with values, and click Send.
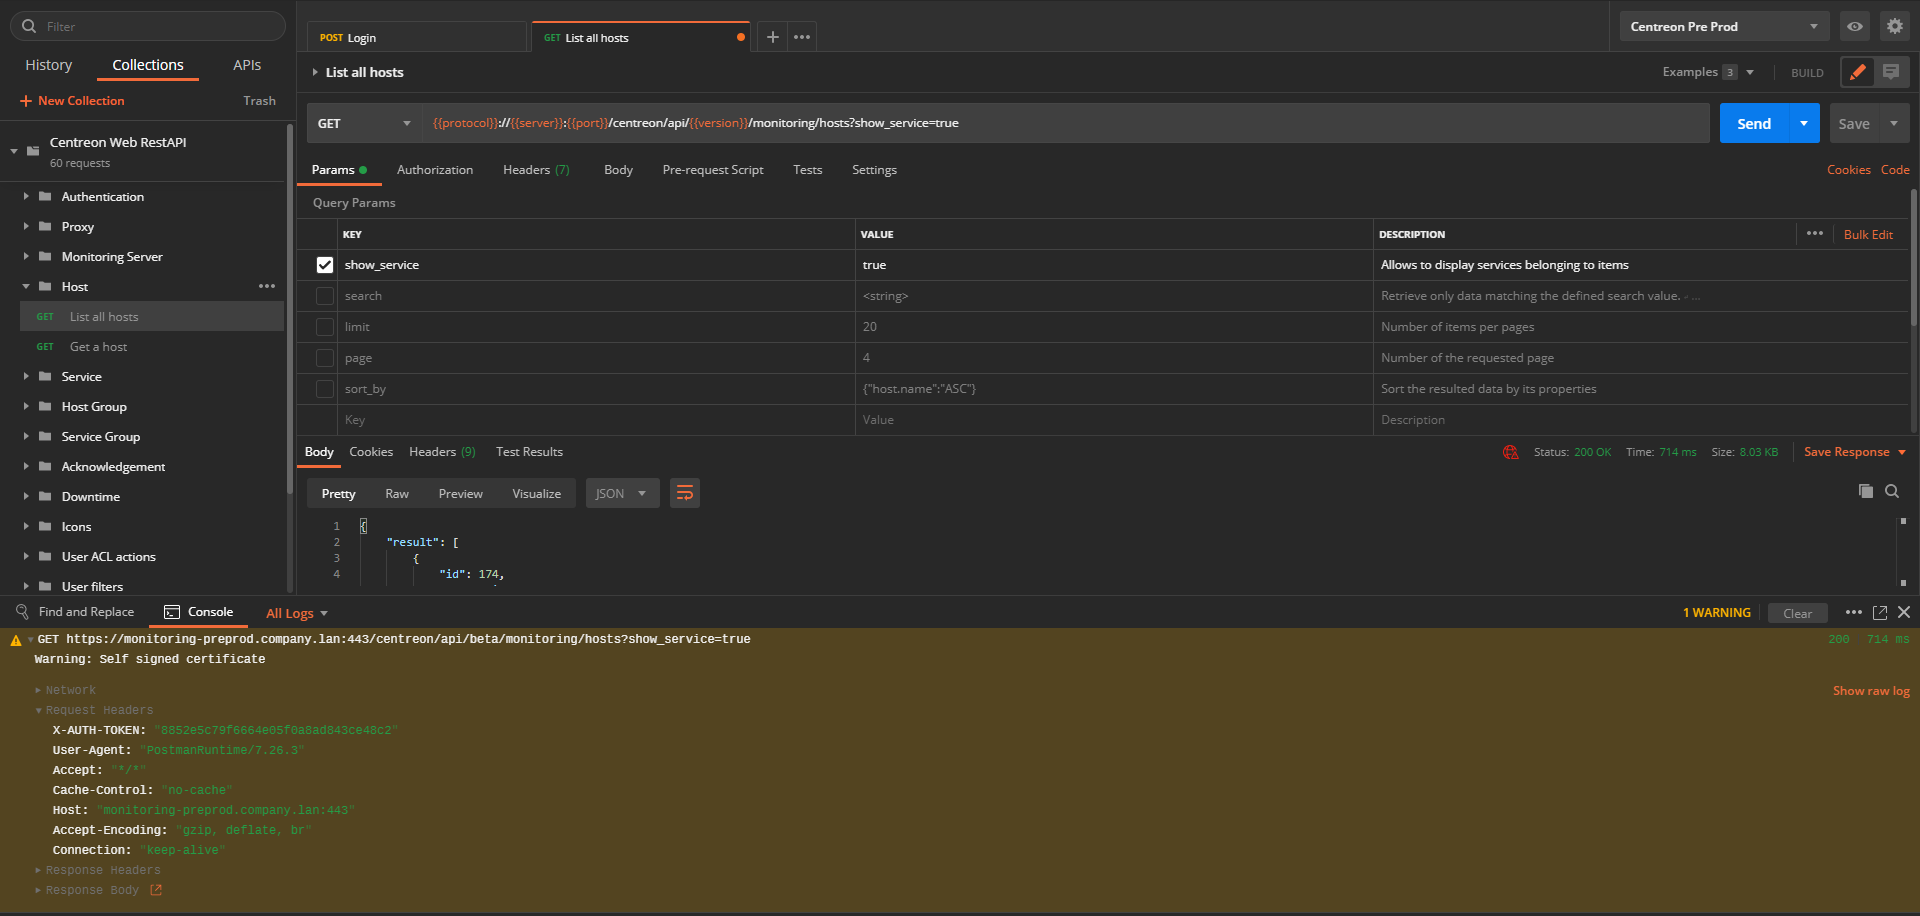
You will notice the token added in the defined header.
If the token expires, just re-execute the Login request to get a new one.