Monitor your first Linux host
Monitoring a Linux server with SNMP
In this tutorial, we're assuming that your Centreon platform is installed and running well, and that you have at least a Centreon IT 100 Edition that provides Centreon Monitoring Connectors (your license is already set up).
Your Linux server will be monitored using the Linux SNMP Monitoring Connector. (More about Monitoring Connectors here).
Prerequisites
On the Linux server you want to monitor
The first step is to activate and configure an SNMP agent on your monitored host. Please refer to the documentation of your Linux distribution to find out how to configure the SNMP agent.
Find below a minimalist snmpd.conf/net-snmp configuration file:
- replace the agentaddress line with the appropriate address of the interface snmpd listens on
- replace my-snmp-community with the correct value for your environment.
- Add the line view centreon included .1.3.6.1 to have access to all information in the MIB required by the plugin
agentaddress 0.0.0.0,[::]

#       sec.name  source          community
com2sec notConfigUser  default       my-snmp-community

####
# Second, map the security name into a group name:

#       groupName      securityModel securityName
group   notConfigGroup v1           notConfigUser
group   notConfigGroup v2c           notConfigUser

####
# Third, create a view for us to let the group have rights to:

# Make at least  snmpwalk -v 1 localhost -c public system fast again.
#       name           incl/excl     subtree         mask(optional)
view centreon included .1.3.6.1
view    systemview    included   .1.3.6.1.2.1.1
view    systemview    included   .1.3.6.1.2.1.25.1.1

####
# Finally, grant the group read-only access to the systemview view.

#       group          context sec.model sec.level prefix read   write  notif
access notConfigGroup "" any noauth exact centreon none none
access  notConfigGroup ""      any       noauth    exact  systemview none none
The SNMP server must be restarted each time the configuration is modified. Also make sure the SNMP server is configured to automatically start on boot. Use the following commands for recent distributions:
systemctl restart snmpd
systemctl enable snmpd
The target server must be reachable from the Centreon Poller on the UDP/161 SNMP port.
On the poller
Connect to your poller using SSH and install the Linux SNMP plugin (see the monitoring procedure for the Linux SNMP Monitoring Connector for more information):
- Alma / RHEL / Oracle Linux 8
- Alma / RHEL / Oracle Linux 9
- Debian 12
dnf install centreon-plugin-Operatingsystems-Linux-Snmp
dnf install centreon-plugin-Operatingsystems-Linux-Snmp
apt install centreon-plugin-operatingsystems-linux-snmp
On the central server
In the web interface, go to Configuration > Connectors > Monitoring Connectors and install the Linux SNMP Monitoring Connector:
Configure the host and deploy the configuration
-
Go to Configuration > Hosts > Hosts and click Add:
-
Input the following information:
- The name of the server (1)
- A description of the server (2)
- Its IP address (3)
- The SNMP version and community (4)
- Select the poller that will monitor your Linux server (keep "Central" if you have no other poller) (5)
-
Click + Add a new entry in the Templates field (6), then select the OS-Linux-SNMP-custom template (7) from the list:
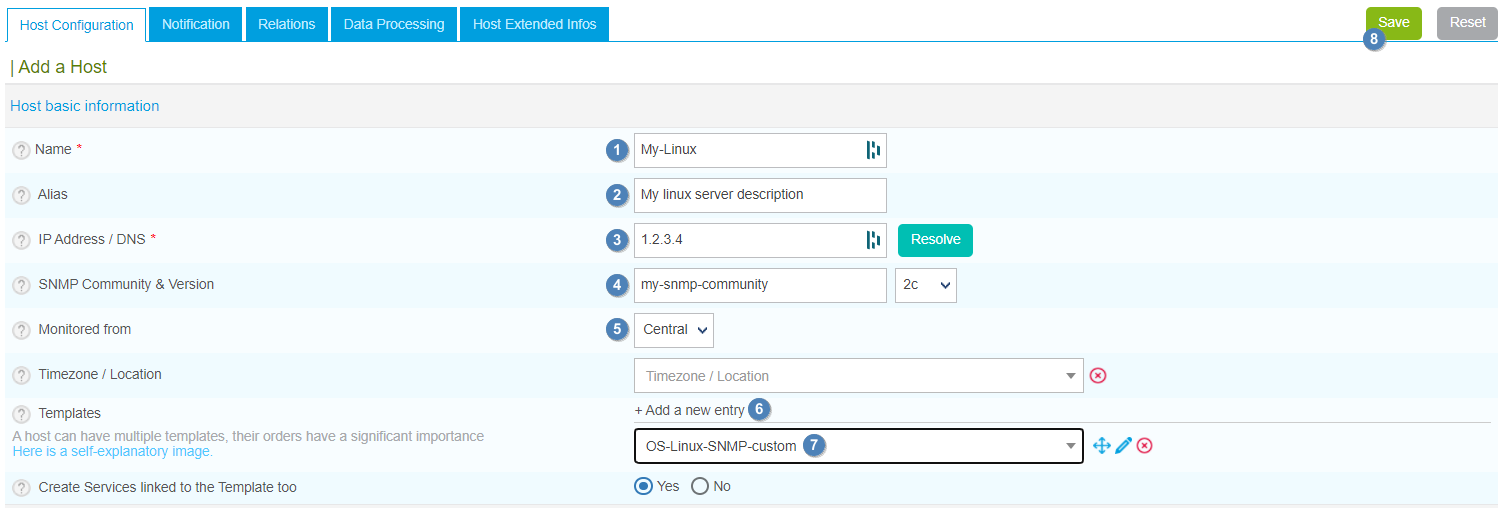
-
Click Save(8). Your device has been added to the list of hosts:
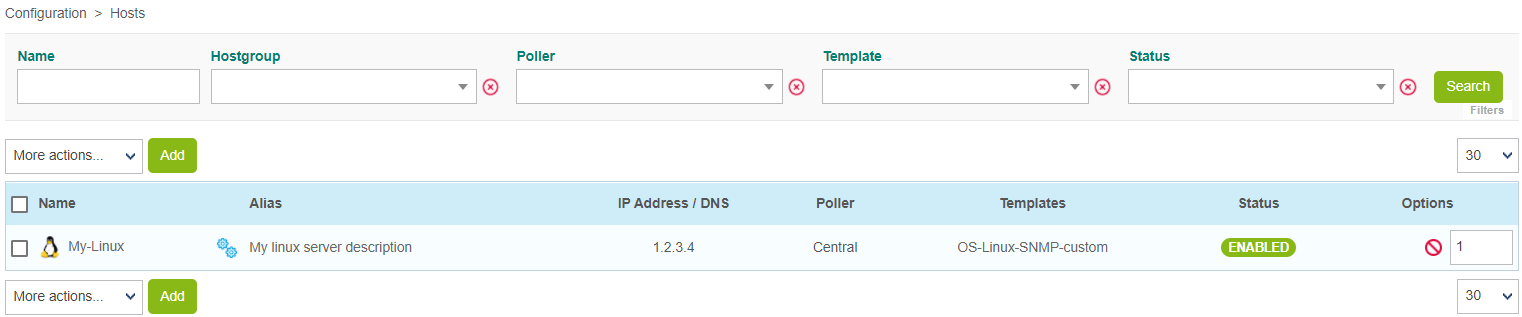
-
Go to Configuration > Services > Services by host. A set of indicators has been created automatically.

You can also use the shortcut beside the host's name to go directly to Configuration > Services > Services by host. The list will be filtered by host name:
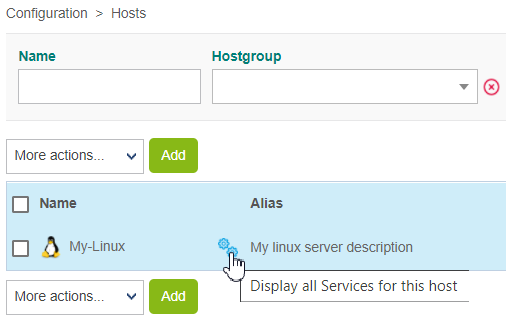
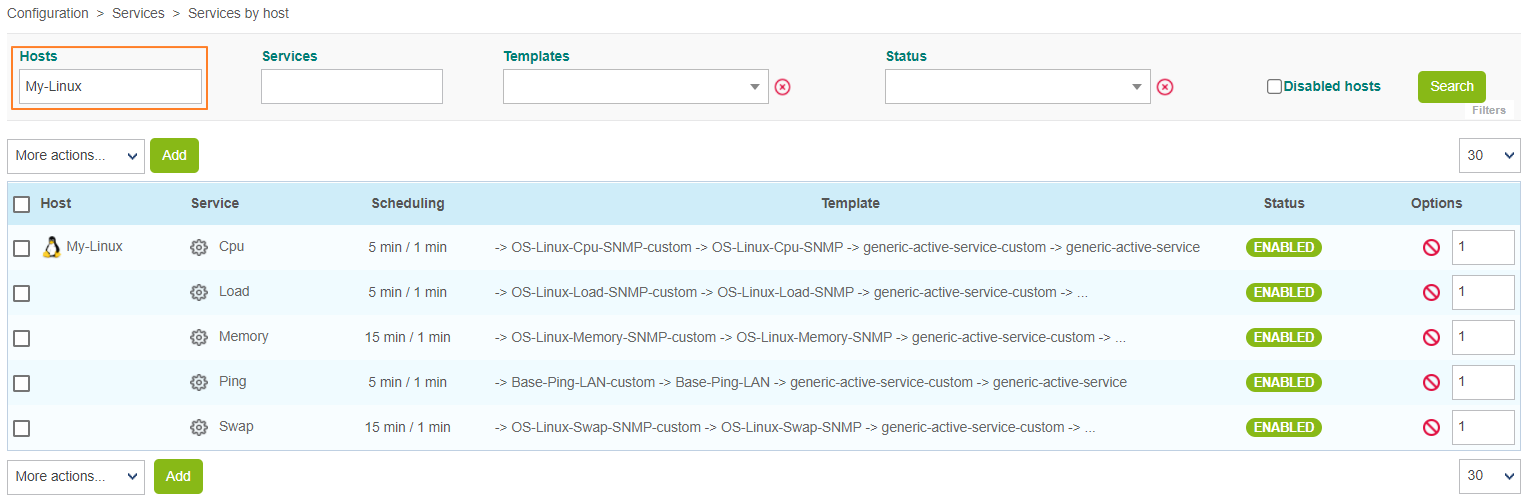
-
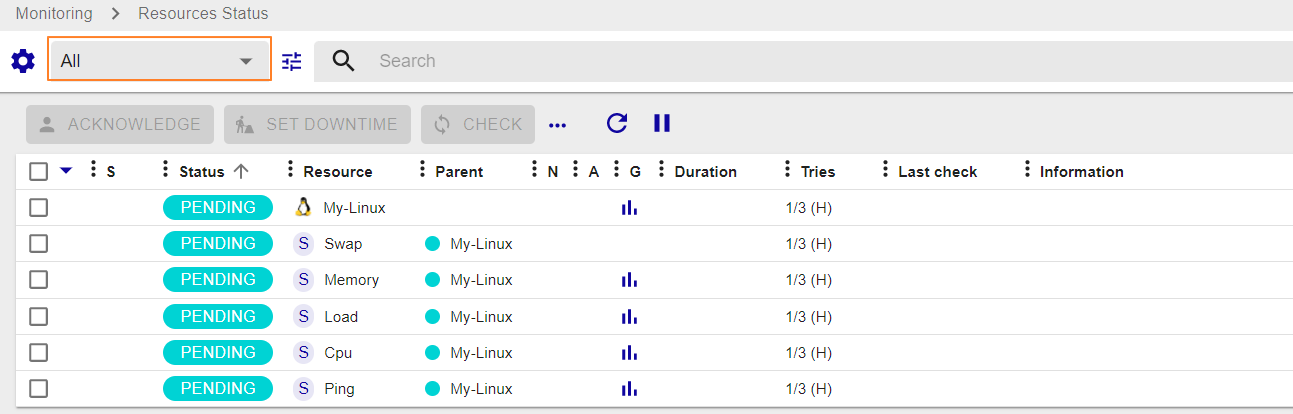
Go to Monitoring > Resources Status and select All from the Resource status filter. At first, the resources appear with the status Pending, which means that no checks have been executed yet:
After a few minutes, the first results of the monitoring appear:
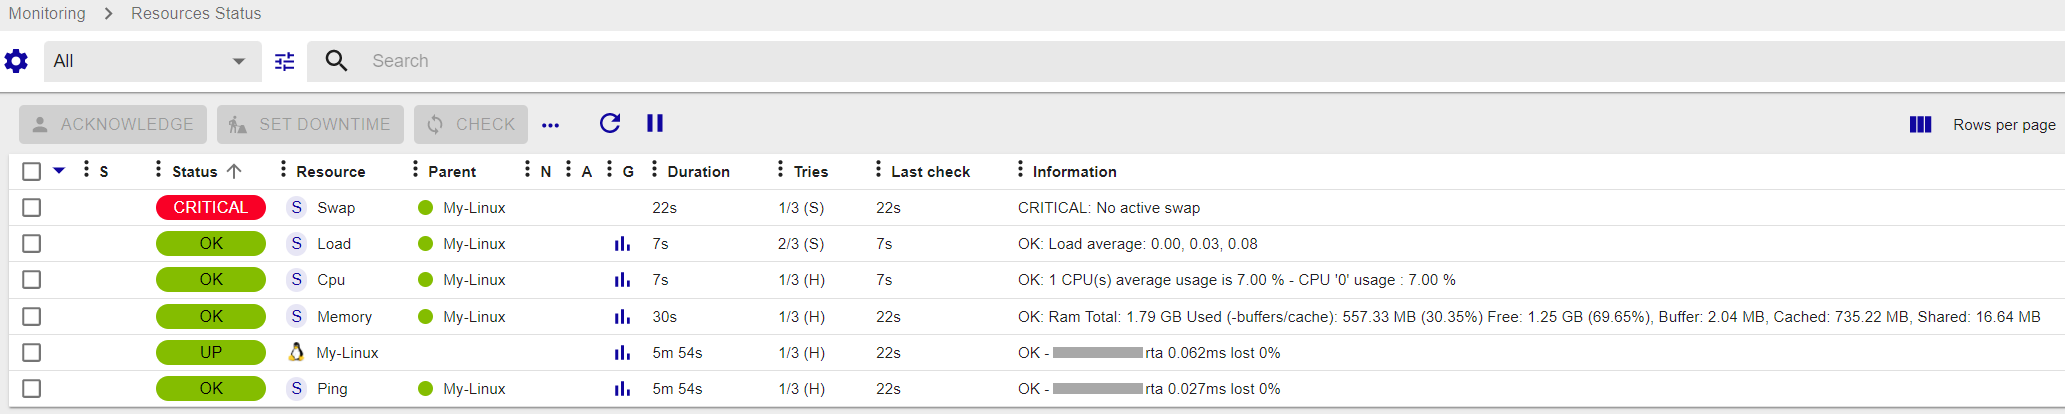
If not all services are in an OK state, check what is causing the error and fix the problem.