Using a virtual machine (VM)
On its download page, Centreon provides ready-to-use virtual machines. These virtual machines are available for VMware environments and for Oracle VirtualBox. They are based on the Alma Linux 8 and 9 and Debian 12 operating systems and include a Centreon installation that allows you to easily start your first monitoring.
Virtual machines are only suitable to use Centreon IT-100 or to test the solution.
The VMs use the Thin Provision option to save as much free space as possible on the disk (this is best practice).
Prerequisites
The host machine must have the following characteristics:
- Processor: any recent Intel or AMD processor with at least two vCPUs.
- Memory: depending on your operating system, you will need at least 1 GB of RAM. To fully enjoy the Centreon experience, you need at least 2 GB of free memory.
- Hard disk storage: The virtual machine requires at least 6.5 GB of free space on your hard disk. However, if you want keep using Centreon, it is recommended to have at least 10 GB, because it will grow over time.
Step 1: Downloading the virtual machine
-
Make sure your virtualization tool (VMWare or VirtualBox) is installed on your machine and up to date.
-
Depending on the type of license you want to use, go to either of the following pages:
- Download page (all types of license)
- IT-100 free trial page
-
Go to the Centreon download page. In section 1, Appliances is already selected.
-
In section 2, select which version of Centreon you want to download.
-
In section 3, Download your image, click the Download button next to the type of VM you want (be careful not to mix up images for VMWare and VirtualBox). A new page opens.
-
If you want Centreon to contact you, fill in your details, then click Download.
-
Otherwise, click Direct download.
-
-
The file you have downloaded is an archive file. Extract its contents to the folder you want.
-
Go to the IT-100 free trial page.
-
Fill in the form to request your free IT-100 token, then follow the instructions you have received by email.
-
Further down the page, in the Download Centreon section, download the correct image for the type of VM you want (be careful not to mix up images for VMWare and VirtualBox).
-
The file you have downloaded is an archive file. Extract its contents to the folder you want.
Step 2: Installing the virtual machine
- VMware
- Oracle VirtualBox
- Import the centreon-central.ova file into VMWare. A terminal window opens; wait for the server to start. When it is ready, the terminal shows the following message:
centreon-central login: _
-
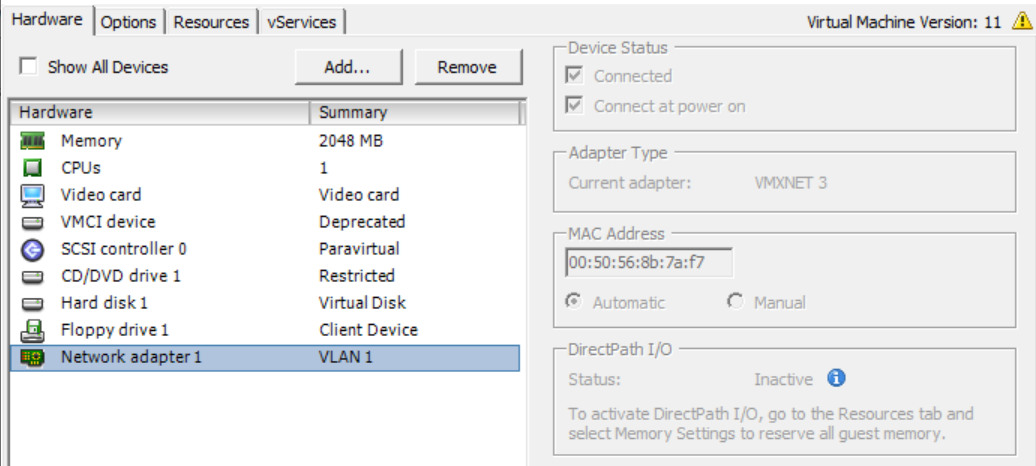
According to how your network is set up, in the configuration of your virtual machine, add a network adapter and select the network through which the virtual machine can communicate with the resources it will monitor. Here is a configuration example in VSphere 6:
-
Import the centreon-central.ova file into VirtualBox. The VM is added to your list of VMs in VirtualBox.
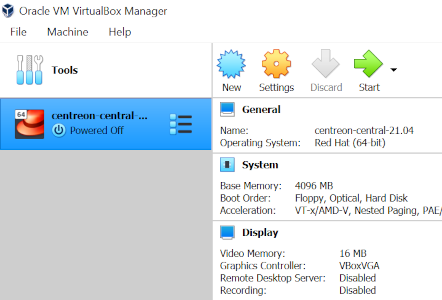
-
In the right-hand panel, click Settings. The Settings dialog box opens.
-
On the System tab, check the Hardware Clock in UTC Time box.
-
According to how your network is set up, add a network adapter and select the network through which the virtual machine can communicate with the resources it will monitor. For instance:
-
On the Network tab, select Enable Network Adapter.
-
In the Attached to list, select Bridged Adapter.
-
In the Name list, select the network card you want.
-
-
Click OK.
-
In the right-hand panel, click Start to start the VM. A terminal window opens; wait for the server to start. When it is ready, the terminal shows the following message:

Step 3: Completing the configuration
-
Log in to the Centreon server using the following credentials: login:
root, password:centreon. -
To find out your server's IP address, type
ip addr. (By default, the VM has a qwerty keyboard. If you have an azerty keyboard, enterip qddr.) The VM is configured to obtain an IP address from the DHCP server automatically.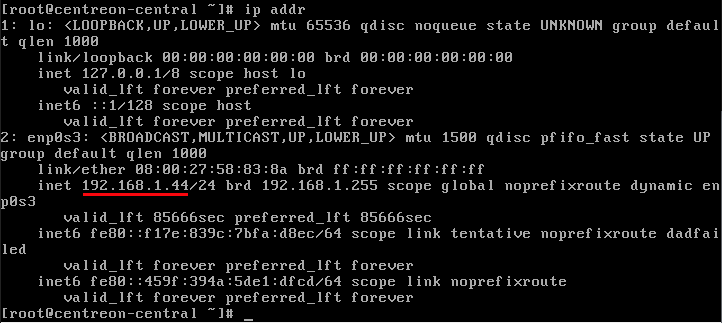
-
Log in to the server from another machine, as user
root, using the terminal you want and the IP address you obtained in the previous step. -
The first time you connect to the server, instructions are displayed to help you complete the configuration.
- Alma 8 and 9
- Debian 12
Change the following settings:
-
The time zone for the Centreon server. By default, it is set to UTC. This will set the time for the various Centreon logs.
Use the following command:
timedatectl set-timezone your_timezoneFor example, to set the time zone to Europe/London, type:
timedatectl set-timezone Europe/LondonYou can obtain a list of all available timezones using this command:
timedatectl list-timezones -
The time zone for the PHP server. To avoid errors, this should be the same as the time zone of the server. By default, it is set to Europe/London.
- Open the following file:
/etc/php.d/50-centreon.ini
-
In
date.timezone, define the time zone you want. -
Restart the PHP server:
systemctl restart php-fpm
-
The hostname of your server (this is optional). The default name is
centreon-central. To change it, use the following command:hostnamectl set-hostname your-hostnameFor example, if you want your machine to be called
monitoring, type:hostnamectl set-hostname monitoring
Change the following settings:
-
The time zone for the Centreon server. By default, it is set to UTC. This will set the time for the various Centreon logs.
Use the following command:
timedatectl set-timezone your_timezoneFor example, to set the time zone to Europe/London, type:
timedatectl set-timezone Europe/LondonYou can obtain a list of all available timezones using this command:
timedatectl list-timezones -
The time zone for the PHP server. To avoid errors, this should be the same as the time zone of the server. By default, it is set to Europe/London.
- Open the following file:
/etc/php/8.2/mods-available/centreon.ini
-
In
date.timezone, define the time zone you want. -
Restart the PHP server:
systemctl restart php8.2-fpm.service
-
The hostname of your server (this is optional). The default name is
centreon-central. To change it, use the following command:hostnamectl set-hostname your-hostnameFor example, if you want your machine to be called
monitoring, type:hostnamectl set-hostname monitoring
-
Add a MariaDB table partition. This step is mandatory. Your Centreon server will not work if this isn't done.
-
Connect as user
centreon:su - centreon -
Type the following command:
/bin/php /usr/share/centreon/cron/centreon-partitioning.phpThe partition is created:

-
Connect again as user
root:exit -
Restart the Centreon broker process so that changes are taken into account:
systemctl restart cbd centengine gorgonedYour Centreon server is now ready to use.
Once those operations have been carried out, you can get rid of the message that describes them in the terminal. To do so, delete the following file:
/etc/profile.d/centreon.sh
-
-
To log in to the web interface, go to
http://ip_address/centreonorhttp://FQDN/centreon. (For example, a valid URL would behttp://192.168.1.44/centreon.) -
Log in using the following credentials: Login:
admin, password:Centreon!123. By default, your server has a predefined configuration to monitor the Centreon server itself. -
According to your Centreon edition, you may have to add a license (for exemple, a free IT-100 token: go to Administration > Extensions > Manager and click Add Token).
-
Update your Centreon platform.
-
Change the passwords for the root and admin accounts. This is mandatory as the default passwords are available publicly in this documentation. You must also define a password for the MariaDB database.
-
You can now monitor your first host.
Default credentials
- To log in to the Centreon web interface, the default credentials are:
admin/Centreon!123. - The server administration account (using SSH) is:
root/centreon. - The root password of the DBMS is not initialized.
For security reasons, change these passwords after you complete the installation.
Troubleshooting
If your VM will not start, check that you used the correct image for your virtualization tool (OVA format for VMware environments and OVF format for Oracle VirtualBox). You may also want to visit our community platform The Watch.